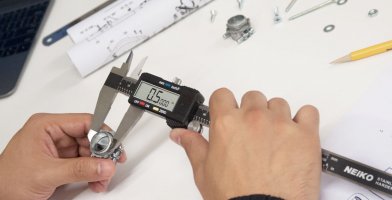
Best Drywall Sanders Reviewed In Depth
If you work around your home or other homes, you are going to be working with a lot of drywall. In fact, in the last hundred years, once drywall became an established alternative to lath and plaster, it became perhaps the most common material in and around North American homes. A colossal 85,000,000,000 square feet of wallboard is produced worldwide every year, 42,000,000,000 square feet in North America alone. The average US home has around 7.31 metric tons of gypsum (the main ingredient in drywall). With this vast amount of drywall throughout our society, knowing how to work with it, and having the best tools with which to do so is paramount.
Our Top 3 Picks
[srpshortcode id=”4993″][/srpshortcode][srpshortcode id=”4994″][/srpshortcode][srpshortcode id=”4995″][/srpshortcode]
A drywall sander allows you to smooth and shape drywall and prepare it for any upcoming projects. Drywall needs to be smoothed out before paint can be applied, for example, and rough edges need to be shaped. Removing rust, old paint and mudding compound is also a frequent need. All necessary tasks when working on drywall.
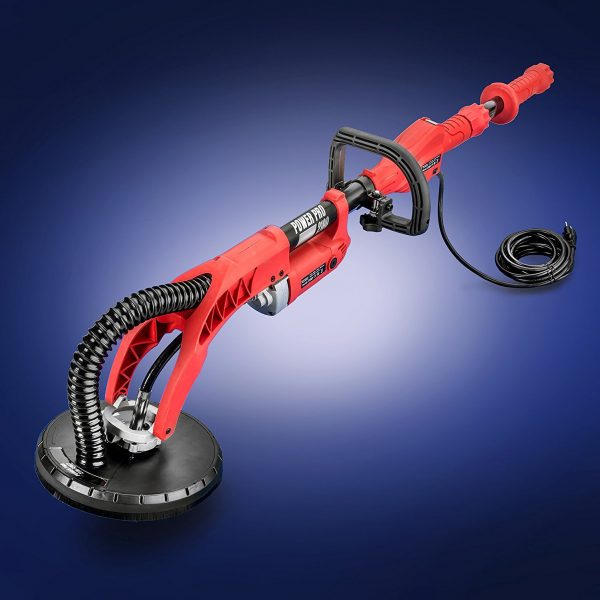
Knowing the high demand out there for a reliable drywall sander, we have assembled this list of the best operating and most cost efficient drywall sanding devices. This strong demand has also led companies to create a broad and diverse selection of these tools. This has made our task a bit more difficult since it required us to dig through a rather significant amount of drywall sander options. Some of those we looked at are capable of working vast swaths of drywall in a matter of minutes, others fell apart or damaged the surface in even less time. Our goal was to weed out those duds and to leave you with a list of devices that all work well, and represent different needs and different cost brackets.
We tried to avoid adding reviews of very similar tools. This means that tools from the same brand and same family of tools were often excluded in favor of a single representative. So if a device fits your needs well, spend an extra few minutes making sure it doesn’t have a cousin that maybe fits your needs even more. Making this list allows us to cover more ground in both capabilities and price ranges.
As for the rankings, these are somewhat subjective. The tool that is most valuable to you will be the one capable doing the tasks you specifically require. Our rankings were done at a price to value ratio in place of having an actual task at hand. Think of the rankings more as a signpost or guide rather than a hard fact, and always make sure you go with the best tool for your unique needs.
10 Best Drywall Sanders
1. PORTER-CABLE 7800
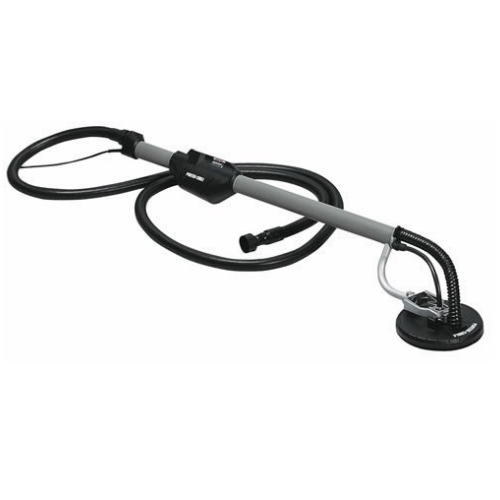
Weight: 8.5-pound
Rotations per Minute: 1400 to 2000 RPM
Motor: 4.7-Amp
13-foot vacuum hose that dissipates static
Lightweight, 8.5-pound body
Hook-and-loop straps
Variable speeds
Price/Value:
This is a mid-tier cost sander, but is incredibly reliable and effective. It balances cost with ability and comes out on top, but the price may make it somewhat exclusionary to the professional class.
Who Should Buy This?:
This is an incredibly useful tool, and definitely, could be put to use for a number of scenarios - including home use - the price may make it a bit overkill for a single home use. Either way, a pro or anyone lucky enough to get their hands on one will be able to tackle sanding jobs with ease.
Compatible with a slew of augmenting devices.
Good dust cleanup
Versatile
Mid range price may put it into the “Low-end professional use” category
2. Power Pro 2100
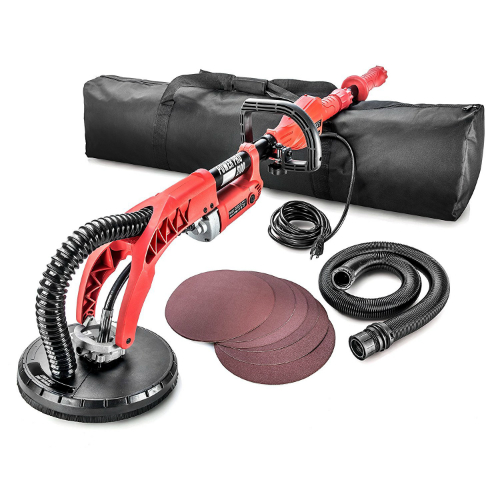
Weight: 10 pounds (Shipping weight)
Rotations per Minute:1000 to 2100 rpm
Variable speed adjustments
Extendable handle from 4ft to 5.5ft
low-weight,strong aluminum
Pivoting bearing seat
Price/Value:
Very solid tool coming in at a fair mid-tier price. This tool matches it cost in usability and then some. It is not the best tool in its class, but it has some stand out attributes and can easily find a home on a number of worksites.
Who Should Buy This?:
This is more on the professional side of things due to the size and cost, but a homeowner planning on some serious wall work can probably get his money back through time saved with this device. An all around great buy.
Well built
Good RPM control
Easy to use
Heavy front-end
A bit heavy
3. Arksen 6
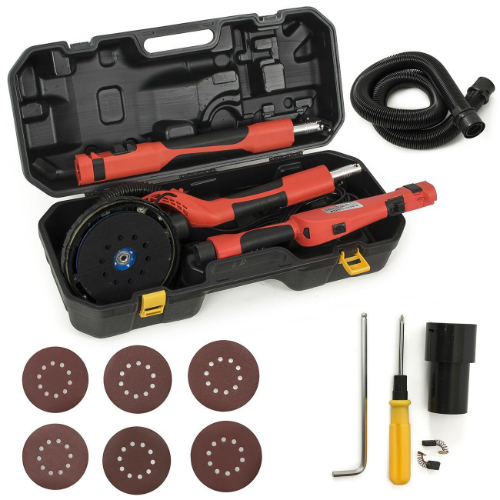
Weight: 29 pounds (Shipping weight, actual tool will be much less)
Rotations per Minute: 450-1,050 RPM
Heavy duty construction
Portable grip handle
Dust collection hose
Head that swivels
Pole Sanding Extend
Variable-speed dial
Price/Value:
This is a solid piece of equipment for a good price. It is highly recommended by contractors for dealing with large volumes of material. It is priced fairly in the mid-range and provides a fantastic set of focused abilities, much like the other comparable offerings.
Who Should Buy This?
Homeowners or professionals with a lot of surface area to cover and in need of the extension option. The price isn't exclusionary and the abilities mesh well with a large number of needs.
Easy to clean and easier to operate
Fast
Decent steering
Good ergonomic design
Heavy
4. Best Choice
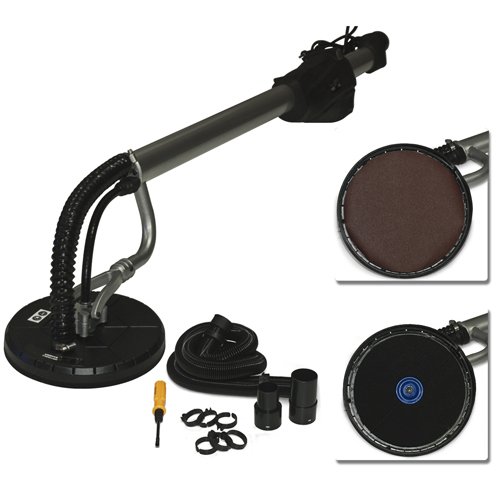
Weight:16.2 pounds (Shipping weight, actual tool will be much less)
Rotations per Minute: 1000-2100 rpm
710 Watts
Variable speed adjustments
Aluminum frame
Swivel head
Price/Value:
Competitively priced mid-tier that shares many of the same characteristics of the similar offers on this list. Light on features, but effective at what it is built for etc. The price is fair and you will be getting solid value for the tool. Just make sure you already have a shop vacuum.
Who Should Buy This?:
This is a decent tool for all buyers. Durable enough for regular and heavy usage, while priced in such a way as to still appeal to the average homeowner needing that extra umph. This is a solid pro backup device.
Effective
Durable
Feature light
5. WEN 6369
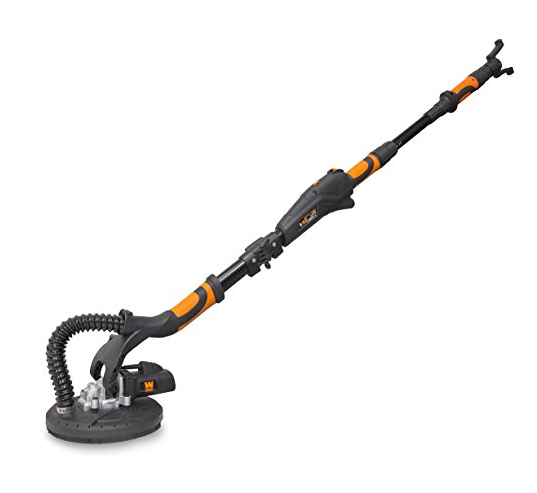
Weight: 9.2 pounds (Shipping weight)
Rotations per Minute: 600 to 1500 RPM
Motor: 5-Amp
Variable speed adjustments
Hook-and-loop base pad for easy changing of sandpaper
Head-mounted motor provides maximum torque
Autodust removal system with the 15-foot dust hose
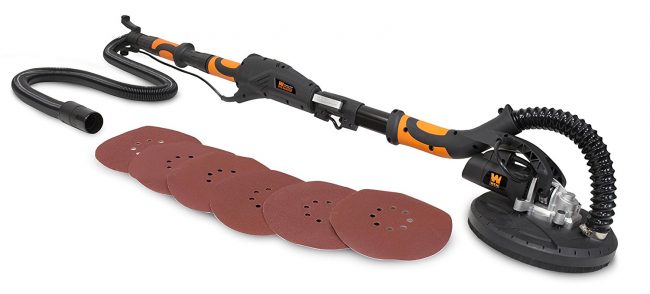
60, 80, 120, 150, 180 and 240 grit hook-and-loop 9-inch sanding discs
Price/Value:
Definitely not the cheapest drywall sander, but it balances that price well with features and functionality. And the price isn't so much as to break the bank or to even make this a high-risk purchase. Great tool, great value.
Who Should Buy This?
Homeowners who have plenty of hard to reach surfaces can make good use out of this tool, otherwise, due to the tools focus, I would say it is mostly in the purview of professionals looking to handle some bigger jobs with relative ease and without spending too much to that end.
Easy to use
Great versatility and variance of settings
Good design for functionality and practicality
The vacuum could be a bit better
Bulkier/more awkward than a pole sander
6. ZENY 750
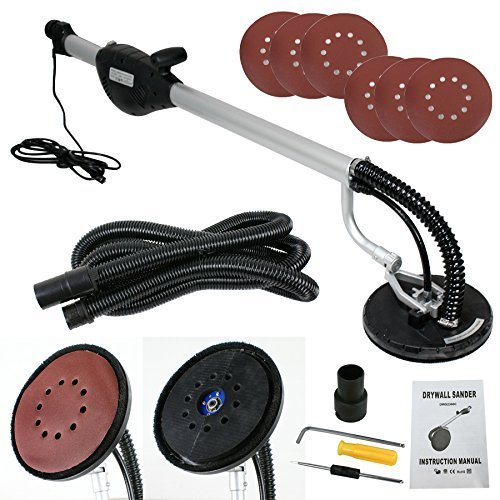
Weight: 10 pounds
Rotations per Minute: 1000-2000 r/min
Portable grip handle
Durable aluminum frame
Light-weight
Head that swivels
Price/Value:
This is a good sander that is sold at a discount price. The quality of materials aren't as great,and it won't last as long, but it is an effective tool at a very reasonable price.
Who Should Buy This?
This probably won’t hold up under extended professional use, but is more than adequate for a one time, or rare usage. Homeowners who only occasionally need a sander will likely find the best value in this tool.
Low cost for output
Discount mid-tier sander
Low cost matches overall durability
7. Festool 571579
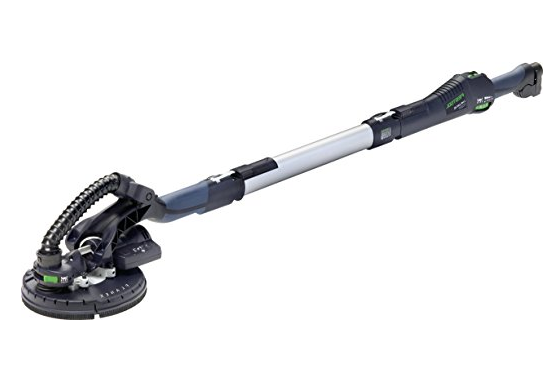
Weight: 10.14 lbs
Rotations per Minute: (Idle engine speed) 340 - 910 RPM
Motor: 550 watt
Two lengths - extend quickly and easily
Two-speed gears for easy, quick material removal
Reliable drive components and good power transfer
Suction power decreases the carry weight of the tool
Price/Value:
This is a very high priced sander that is valued for professionals only. It is simply overkill for a single home - unless you're talking about the Palace of Versailles. If this is in your price range, it will be hard to find a better device.
Who Should Buy This?:
This is priced for professionals who have a high need of a reliable and very effective sander. Outside of heavy usage, it will be fairly impractical - for those pro's in need - it is fantastic.
Very well designed
Great versatility and function
Comfortable to use
Exclusionary price
Heavy without suction engaged
8. ALEKO 804C
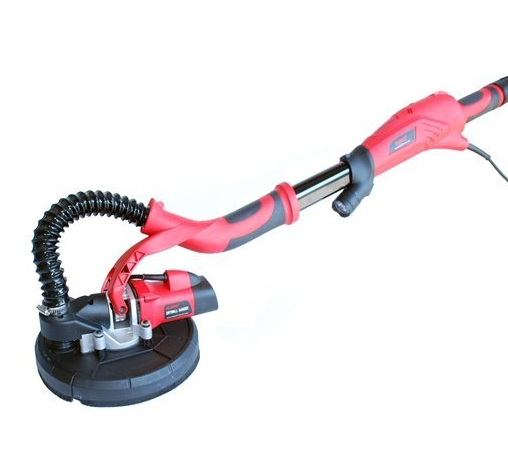
Weight: 8.0 Lb
Rotations per Minute: 600-1500rpm
Input Power: 710W
Telescopic handle
Variable Speed.
Built in light
Price/Value:
Another mid-tier cost device that picks its battles well. It isn't designed for everything, but what it does do, it does great. The value depends on your needs, and if you need a great sander for those hard to reach tall areas, this is a great value.
Who Should Buy This?:
Contractors looking to boost their ability to sand ceilings and high walls, or a homeowner who will likely need to do the same. The cost is a bit high for a single usage or home, but it is not unreasonable if the demand is there.
Versatile, and adjustable (Handle, swivel head, speeds)
Well balanced
Not exceptionally durable
9. Aleko DP-700A
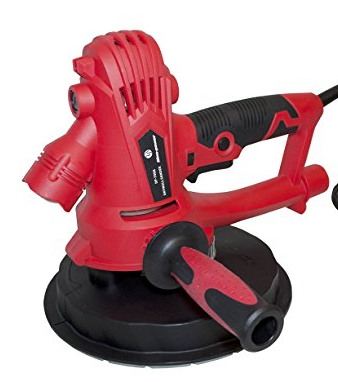
Weight: 8 pounds (Shipping weight)
Rotations per Minute: 1200-2300 rpm
LED light 3.8W allows working in dark environment
Detachable brush segment
Price/Value:
Relatively low cost and effective. If your sanding jobs are straightforward than this is a great device to handle the typical jobs. The price doesn't demand much, and you can argue the tool delivers more than its required value.
Who Should Buy This?:
Though a professional could use this for the occasional job, this tool is probably best suited to the tool chest of an avid DIYer or a homeowner looking to do some remodeling or repairs.
Easy to handle
Lower cost
Clean when paired up with shop vac
Sand discs are hard to find
10. Comie 750W
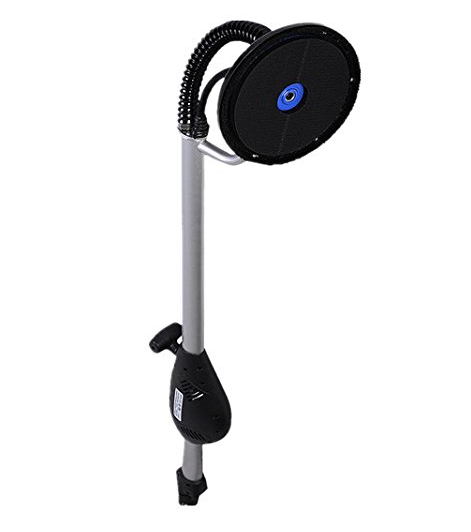
Weight: 11.03LBS
Rotations per Minute: 1000-2000 r/min
Durable aluminum frame, lightweight
Head that swivels.
External Vacuum cleaner
Free Sanding Pad
Price/Value:
Another mid-tier priced device that matches the cost with solid features and abilities. The price isn’t so much that is it out of the homeowner range, but it is substantial enough for you to receive a very high quality device.
Who Should Buy This?:
Mid-tier priced, so it is still in the range of a single homeowner - although the need would have to be very high. Otherwise this is a fairly low cost pro tool, that is light on features but can be utilized as a great workhorse.
Lightweight and easy to handle
Solid abilities paired with a fair price
Issues with tight corners
Criteria for Evaluation
While putting together this list, we had to dig through an enormous amount of drywall sanders. Once we were able to limit the list to our ten favorites, we still had to rank those devices. To sift through the choices, and then eventually rank the tools, we had to put together criteria from which to work from. Some of these criteria are simple and straightforward, such as price and durability, while others were much more opinion based – comfort for example. It may not be immediately apparent why one tool was selected or ranked higher than another. To help answer any such questions or concerns you may have – we have provided the criteria from which we worked from.
Remember as well that a lower ranking tool may be better as a device than one that ranked higher, but it was deemed that the cost of the tool outweighed the benefits. This subjective “value” is explained a bit more under the price section, but took into account all of the possible attributes. A tool will have a unique value rating when it comes to your jobs, however, even if a device was deemed very cost efficient and ranked high, if it cannot perform the work you require, it would have a value of zero to you.
Price
Since our list compares sanders that range fairly drastically in price to one another, we had to look at them from the basis of a price to value ratio. This means that if sander A could do 50% more jobs than sander B, but cost 100% more, we would have theoretically given sander B a better overall value ratio. The argument being you are getting more value for every dollar you spend. The longevity and durability of the tool also influenced the overall value of a device when compared to price as well.
Power (Torque) & Speed (RPM)
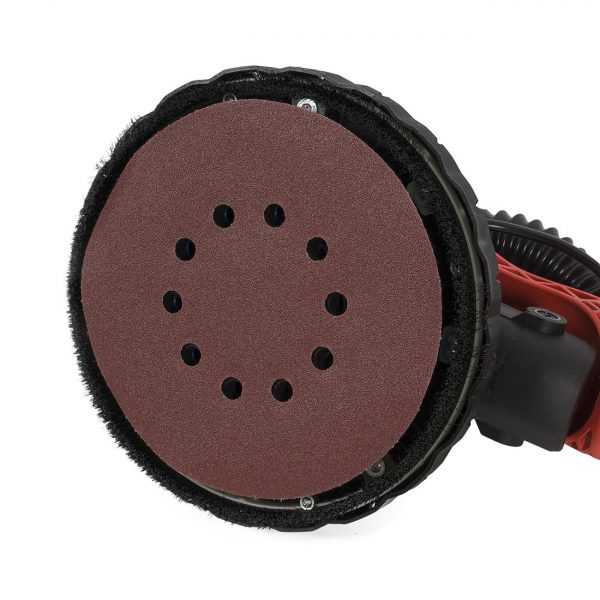
The ability to adjust the speed (RPM) of the tool was an essential characteristic – you will see most of the tools on our selection have that ability – because it allows for much more versatility in the device. This increase in versatility had a large effect on the determined value of the tool. Both the torque and RPM were judged on this variety scale.
Features / Design
Most sanders are built with an express purpose in mind, to that end, many have features that assist in this particular task – be it reaching the ceiling or handling extra tight corners. Features that further benefited the tool counted for quite a bit, functions that did not provide substantial benefits were not as highly rated. So it really came down to the actual practicality and benefit the feature itself provided.
Maneuverability/Weight
Sanders can sometimes be used for large portions of your day. When you are working on tiles, the fatigue rate is not as high, but when you are working ceilings and the tops of walls, you really want to conserve as much weight as possible. A couple of hours holding your arms up can be an incredibly difficult – doing it with a tool is exponentially more challenging. When something is built to be well balanced, and to as lightweight as possible, you can definitely feel the difference.
Comfort
Although this is fairly subjective, and bundles closely with weight, this is still a significant factor. Like we stated before, you don’t want to work multiple hours on end in discomfort – it has a terrible effect moral and productivity.
Useful Drywall Sanding Tips
Not everyone is a fan of sanding drywall for DIY woodworking and home construction. It is a time-consuming and messy project task for beginners in drywall repair. However, if you want your walls to look flawless, then you need to take up the challenge. Preparation and knowledge ensure that your drywall sanding project is easy and quick. Having a few tips at hand means the difference between a botched and great-looking job. Our tips will help you handle the job with confidence as you achieve the best look on your walls.
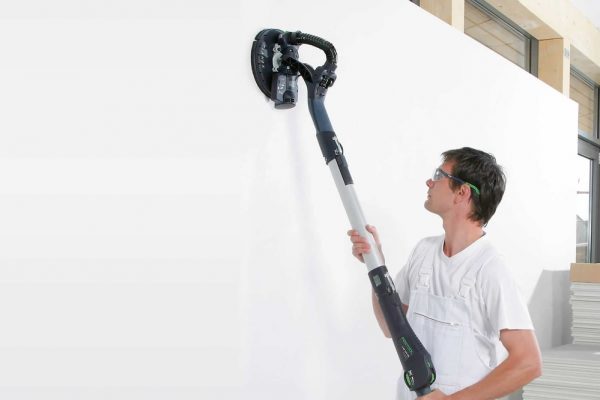
Use the right sanding tools
Just like most remodeling projects, choosing the right tools ensures that you get top-notch results. The main tool used for sanding drywall is a hand sander. You have some of the best ones featured in our top 10 above.
Second, you need a pre-cut and fine 150-grit sanding paper to fit the sander of your choice for a smooth finish. The higher the number of grit, the finer the grit; hence a smooth finish. However, the lower the number of grit the rougher the grit, hence a course finish.
Third, for the best results, you can use a drywall screen to catch drywall dust instead of accumulating the dust on a sandpaper sheet.
If you are sanding large areas, high walls, or more than one room, you should consider using a pole sander. Rather than using wobbly step stools and ladders, the pole sanders provide short, sideways strokes or long, lengthwise strokes. It is ideal for applying the drywall primer before painting, which requires minimal pressure and control. However, you should be careful with the pole sander since it can flip over and scratch the wall. One tip is to position the sander’s head at an angle but not at a right-angle.
Finally, use a sanding sponge to sand and mold the corners. It is better than a hand sander when smoothing the corner since it cannot scratch the opposite walls.
Protect yourself and your surroundings
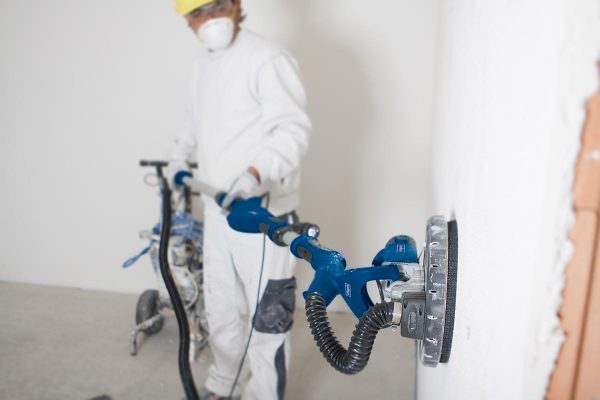
When drywall sanding, wear protective gears such as a ventilated dust mask and goggles. This can help protect you from inhaling drywall dust, which can cause respiratory problems. A hat and a scarf too are essential for preventing your hair from getting dust. It is also important to protect your carpets and floors using drop cloths. Ensure that all ventilation ducts are covered to prevent the dust from spreading to the rest of the house. Also, after you finish the job, clean up thoroughly by wiping all surfaces, vacuuming, or you can purchase a dust collection tool to reduce the dust particles left over after drywall sanding.
To minimize dust, you can use a wet-sanding sponge. For areas that don’t require a lot of sanding, rub over them for a smooth surface. A sponge can also be used to sand on electrical boxes.
Use a handheld light to spot problems on the wall
With a flash light and hand sander, go over the walls and circle pits, dings, and other problems that require filling or detail sanding with a pencil. Then, touch the surfaces up again with a joint compound. Wait for the spots to dry, and finish the job by sanding the marked areas.
Fill large ridges and grooves, but don’t sand them
Retouch gouges and ridges with more joint compound. It is much easier than sanding them out. It is important since too much sanding can damage the paper face on the wall.
Prime the walls before sanding
Most drywall sanding novices usually forget to sand after priming. Sanding at this stage can remove paper lumps and fuzz that might show when painting the wall.
Sand with a light touch
Before you start sanding, make sure that the mud is completely dry. Then, sand in an even pressure in a pull and pull motion, and do not sand over a spot in a straight line. This can lead to a groove or depression that can show up when painting. Instead, move the sander in a circular motion around the edges. If you are using a pole sander, use a side-to-side sweep motion or the push and pull motion since they are difficult to control.
Avoid over-sanding
If you have sanded too much in a particular spot, you can use a joint compound to touch it up and sand again when dry.
Finish with a final and comprehensive inspection
After completing a project no matter what it entails, you must go through it again to avoid any faults or to improve where there are inaccuracies. Therefore, once you are done with drywall sanding, it is important to conduct a comprehensive inspection of all joints, corners, walls, and more. Use a handheld flash light to identify any depressions and imperfections that need a retouch. Mark all the spots with a pencil, and use your sanding sponge to smoothen the surfaces again. However, if there are deep grooves, you will have to re-coat them, wait for the joint compound to dry, and then sand them.
FAQs
Will my Vacuum Have Enough Power to Collect all the Dust?
It really isn’t the strength of the vacuum that causes the most issues with dust collection- it is the method with which the dust is collected in the first place.Typical filters will clog in seconds with drywall dust. You need to ensure you have the correct type of filter and bag to handle drywall dust.
How Is a Drywall Sanding Different from a Wood Sanding?
It is not so much the sander you should think about, but rather the sanding pad. Although they are both measured in grit, their design is rather different. While wood uses sandpaper, drywall will use sanding screens. Sanding screen will work just fine on wood, but sanding paper will have issues with drywall.
Drywall creates a large amount of dust. A sanding screen allows the dust to escape from between the wall and the sanding pad. Sandpaper will quickly run into issues because of dust build up.
Of the most common reasons to prep a wall with sanding, is to make sure it is ready to be painted. When you start to sand, make sure your sandpaper is not very coarse, or it may make scratches and divots you will have to fill in before you paint.
Prep the wood for paint (and sanding) cover the furniture and floors, ventilate the area, etc. a mask will also help you with dust inhalation and paint fumes.
Make sure you remove all of the dust, dirt and grime from the walls before you begin to paint.
After you sand the wall, use a primer or sealer to even the texture out.
What is Grit?
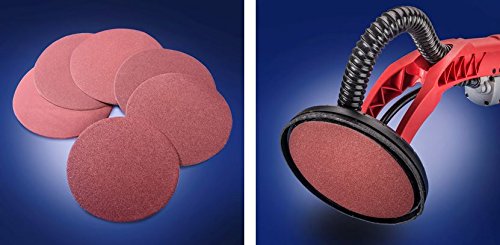
Grit is the size of the raised objects on the sandpaper, the abrasive bits. The lower the grit number is, the bigger the raised objects will be. Paint removal uses a smaller grit number, something that is capable of gouging out the paint, while soft materials will require a high grit number. Sanding away thick material may need a grit number as low as 24, while doing an automotive finish will use a grit around 2000.
Typically, your grit will fall between 50 and 120-grit.
Here is a rough breakdown of the grit number and what it is suited for:
- Paint Removal 40/60 grit
- Chipboard 60/80 grit
- Steel 80 grit
- Solid Wood: 80 grit
- Veneer 150 grit
- Plastics 100 grit
- Balsa Wood 100 grit
- Acrylic 100 grit
Probably the most popular for Drywall sanders will be 120 to 150-grit drywall sandpaper.
What Features Should I look For?
While the features you need will depend on the type of task you will be doing, there is no harm in going over which features are the best for these tasks.
Extendable / Collapsible handle.
This is one of the best features for those who want to work on tall walls, ceilings or any other hard to reach areas. Rather than precariously balance on a ladder, you just extend your handle a bit. It can take some practice to use a sander at a great length from your body, but it is far from impossible. Alternatively, are the long handled sanders that allow you to collapse them down for tight spaces or transportation. This combination is also great for boosting the overall versatility and convenience of the tool.
Variable RPM Speeds
This is also necessary for the versatility of the tool overall. Finding the right combination of grit and RPM is essential for achieving the best finish possible.You also want to make sure you are reducing heat produced. Start at a lower RPM and work up until you see no visible increase in dust being produced. Higher grits will generally require higher RPMs.
Attached Vacuum Accessory
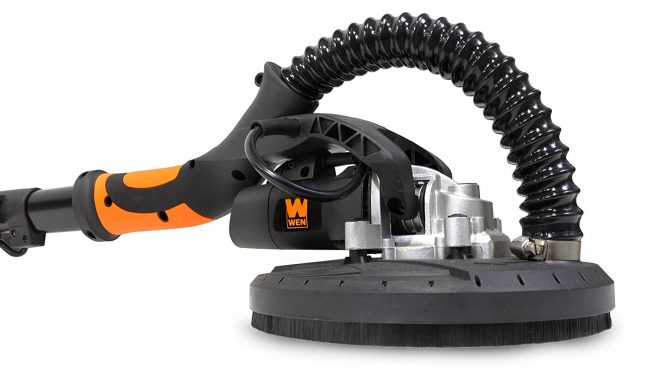
Sanding drywall can create a whole lot of possibly harmful dust – it creates a mess and a minor health hazard. You need to make sure a room is properly prepared and that there is good ventilation. These precautions are still needed, but to a lesser extent with a tool that is able to catch the majority of dust being produced before it enters the air. Well built sanders that can vacuum almost all the dust up as it works are worth their weight in gold when you realize how much time and trouble they actually save you.
Making Your Decision
So this list of drywall sanders, the FAQ on the tool, and the criterion from which one can judge the worth of a device should all be able to help you make a more informed choice when finally deciding on your purchase. Making a large purchase, as buying power tools often is, can be a frustrating and nerve racking process – especially when you are new to the needs or function of the tool. This list should give you everything you need to understand what you will need, why, and what you can expect to pay for it. You may not agree with all of our opinions, but that is fine – a disagreement is often a great tool for formulating your own opinions. Either way, this list should make it unlikely that you will come away from the purchasing experience dissatisfied.
So whether you are looking for a tool to help you power through that next remodeling of your bedroom, or a professional looking for something to get them through the next couple years of work – there is something here to fit your needs. Good luck – and remember – build smart, build safe, and build big.


