- No Obligations
- Stop Paying Too Much For Your Contractor
- No Spam Calling
- Screened & ID Checked Contractors only!
Garage Door Weather Stripping Practical Tips
0
 Garage Door Weather Stripping Practical Tips
earlyexperts.net
Garage Door Weather Stripping Practical Tips
earlyexperts.net
If you’ve ever experienced the perils of street parking, then you are also privy to the extreme privilege that is owning a garage. Having a shelter for your vehicles is truly a blessing. This is especially true on those bitterly cold mornings when garage-less neighbors struggle to fire their engines.
With so many benefits inherent to the garage itself, why not take full advantage. Weather stripping your overhead door adds further insulation to the contents of your garage and will even protect from the moisture that always seems to find its way through in rainstorms or snow falls. It is also a fairly easy do-it-yourself project that handymen and woman of all experience and skill levels can easily accomplish. All you need is a Saturday morning and the steps outlined below, complete with some pro-tips for a more expert finish.
Remove Existing Weather Stripping
First and foremost, if you have existing weather stripping, you are going to need to remove it. This is easier said than done. You will want to be extremely careful so you do not damage any of the existing wood on the garage door frame.
In order to describe this process, it is necessary that we have a common language with which we can identify the material concerned with sealing up that garage. First, what is referred to as “weather strip” is the soft, vinyl material that actually serves the purposes of overlapping gaps between your garage door and its opening.
The weather stripping is attached to a piece of frameboard that is then secured to the garage itself. This board is very similar to molding and is even sometimes similarly decorative. This is typically referred to by its location on the garage door frame. In other words, if it is meant for the top of the opening, it is the “header,” and the pieces that run vertically along the sides of the opening are aptly named “sideboards.”
To remove the weather stripping that is already there, you will need to pry the existing weather stripping from the garage door frame. Using a hammer, gently tap the butt end of a pry bar in between the sideboard/header pieces and the garage door frame. You will want to start at one end and work your way along the length of the board as you gradually pry and pop the old nails out.
Working in the middle, or starting on an end and jumping too large a section, will likely cause the board to snap. This is no big deal since you are getting rid of it anyway, but you might as well work clean if you can.
It is also a good idea to use a scrap piece of material in between the pry bar and the garage door frame as you are prying. Remember the wood around your garage is exposed to all sorts of weather and is likely softer than what you might find indoors or somewhere more protected. Using the frame itself for leverage is not your best bet and it is possible you end up creating a dent in the wood. If you have a thin piece of plywood, this is probably best. You can also use a thin piece of metal, like a putty knife, to back the pry bar.
Speaking of damaged wood, be sure to replace any rotted pieces that reveal themselves after the old weather stripping is removed. Going forward without doing so is going to render your new weather stripping useless.
Cut stripping to fit
Now that your garage opening is clean of any of the old, tired weather stripping, you are ready to measure and cut the new material!
Start with the header. There is no hard and fast rule for starting up top except that it is hardest to work over your head. In my experience, it is best to get this over with before you start to fatigue. Measure along the top of the opening where the header will go. Your weather stripping material will not come in single runs, and you will have to patch in multiple pieces regardless so be prepared to make a cut.
As the hardboard on the header will butt against an already square garage door frame, it is important that your cuts are clean and straight. Otherwise, you will not get the best seal at the corner of your garage door. To ensure a nice, clean edge, use a T-square and a chop or miter saw. If you do not have access to any power saw, you may use a hand saw. Just be sure to sand that edge when you’re done.
Nail it in
Now that you are all measured and cut, it is time to secure the header piece of weather stripping to the top of the garage opening. Before you do, be sure to close the garage door. This will give you a reference point and a sense of how the vinyl strip itself will lie against the door.
You may have purchased a garage door sealing kit, which would come with the various materials necessary to complete the job. In some cases, header and sideboard pieces within these kits come marked for nail holes. If not, you will have to make a bit of a judgment call. Rule of thumb is 8-12 inches between each nail.
In terms of nails themselves, you will need something that will hold your weather stripping firmly in place, but that also won’t split the header or sideboard material. Again, in some kits, you may find nails included. If not, go with ¾-1 inch roofing nails. These are perfect as they are intended to hold up outside and have a nice broad head.
Measure and cut side
Repeat the same measure and cut procedure for the sideboard. This time measure all the way from the face of the header piece that is secured overhead to the garage floor.
Miter Sideboard Vinyl
The only difference in measuring, cutting, and securing the sideboard pieces from the header is how you treat the vinyl weather stripping itself. Because of the way the vinyl bends when it presses against the garage door, you will want to cut the vinyl for each side of the frame to a 45-degree angle. This way, as the door closes the vinyl above and on each side overlap nicely on the corners, providing a nice seal in those vulnerable spots.
The best way to cut this angle is to lower the door and hold the sideboard up in place. From here, you can mark the angle more easily. Use a utility knife or pair of heavy clips to make the cut.
Test door
Once you have tacked the two sides up, making all appropriate angle cuts on the vinyl, you should be good to go! Before you call it a day, though, make sure to give your door a test run.
When you do this, you are looking to make sure your door is not getting caught up on the vinyl as it opens and closes. Be sure to check this a few times over the next few days as the boards may shift around a bit while settling into place.
Conclusion
Sealing up your garage door is an extremely useful and easy home project to tackle before fall and winter weather set in. This is not one of those tasks to put off. If u have a garage you are already reaping the benefits of protection for your car, lawnmower, tools, and other toys. Why not maximize that protection, sealing the overhead door to keep the floor bone dry? Weather stripping the garage should be a special priority if your garage is attached to your home. No matter how small the cracks, heat and cold will always find a way in. Sealing your garage door is a manageable and practical means of keeping the weather out and your HVAC costs low.
Most Read


Find Out How to Plant a Pineapple in Your Garden
Apr 06, 2021
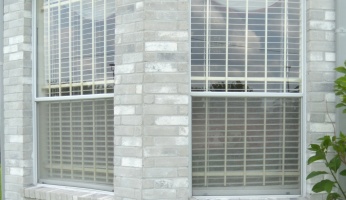
Window Security Bars: Types and Cost
Apr 06, 2021

Front Load VS Top Load Washer: Which One To Choose?
Aug 06, 2018