
Basement Remodeling Cost Guide
If you are wondering how much would remodeling your basement cost, our overall basement remodeling cost guide is the resource you need to check!
Why Homeowners Remodel the Basement
You have a nice house with that coveted “extra space below” – the basement. The basement is the neglected part of the house – much like the home’s junkyard or ghost-room where all unwanted stuff is dumped and stored. In there you will find broken furniture, a disused treadmill or television set, old mattresses, tools and machines, great grandma’s chest of photographs, artifacts, diaries, and other memorabilia from seven generations back. For some people, the basement is too small a space to be useful, so they leave it to some functional use like a storeroom, pantry, fuel storage, vault, boiler room, laundry room, a tool storage, or just a space that is in a state of disrepair.
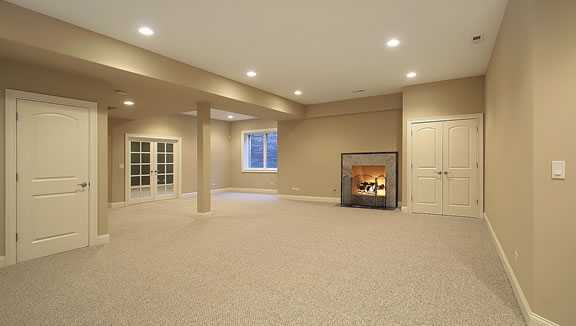
You decide to utilize the 600 square feet of space below to expand your living space into a spare bedroom, laundry room, children’s playroom, or a storeroom. Perhaps your dream basement is a cozy and luxurious bar, pool table area, home theatre, art studio, kitchen, or sauna. Remodeling the basement is a complex and daunting task with many design and plan details. However, any basement plan should include such basic facilities as the staircase, bathroom, storeroom, and utility room.
DIY versus Contracting
Labor is a major budget consideration in remodeling, therefore you have to choose between a contractor and DIY. If you have a tight budget or are DIY savvy, then you might choose to remodel, but it will take you many days to complete the project. You are likely to omit important details and end up with a squeaky staircase, crooked cabinets, flooded foundation, poor lighting, hazardous electrical installation, or a cold environment. As a DIY you can still save as much as 20% in labor by doing the design and planning, excavation, masonry, carpentry, transport, and other non-technical tasks, but you will still need an assistant.
The local authorities inspect DIY projects more stringently than professional jobs, and your insurer might either raise your premiums or decline to settle future claims on account of poor workmanship. A contractor is expensive to engage, but he will guarantee the quality of workmanship, help in fine-tuning the design. He will complete the project faster since he has the skill, machinery and equipment, and time to remodel. As a DIY, you might have to rent an excavator, a concrete mixer, or some other equipment. Our advice therefore is: in basement remodeling DIY IS A BAD IDEA. Leave the technical work to the real experts. For once go by the clichés, “Two heads are better than one”, and “many hands make light work”.
Stages in Remodeling
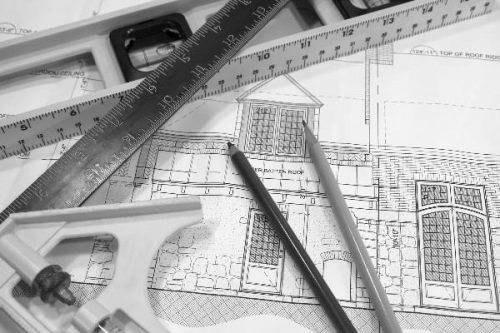
Now that you have decided to transform your basement to fit in with the rest of the house, you have to plan and execute the remodeling. You have already identified your flagship project, for example, a bedroom, an entertainment center, or a gym, and the rest of the space will be for other functions. You need to first familiarize yourself with the building code and local bylaws. You will draw the new basement designs and plans, and do the costing according to your budget. You will then ensure your basement is waterproofed, utilities repaired, and lighting, ventilation, and energy conservation are installed. Build the ceiling, the walls, and do the partitioning. Finally, finish the basement and add the décor, ambience, and acoustics.
Safety, Comfort, and Functionality

Before you remodel the basement, consider the basic requirements; A homely space that is safe, comfortable, and functional. It should be a multi-purpose space with good ventilation, illumination, and warmth. A touch of taste and luxury will not do any harm, but it will dent your pocket. You have to comply with staircase safety standards (see the article on Cost of Constructing a Basement Staircase) and eliminate moisture in the basement. It is wise to get insurance covers for flooding and site accidents before you embark on the remodeling. Ensure proper lighting for workers in the basement and provide for emergency exits as regulated in the building code. Utilize all available space and choose materials according to the desired basement functionality and according to your budget.
Bylaws and the Building Code
The International Residential Code has issued safety guidelines for basement renovation. It lays out the safety standards for lighting, fire protection, electrical installations, water piping, emergency exits and the staircase, and minimum height of the floor to ceiling. A fuse box must have 15-amp and 20-amp circuit breakers. The code specifies what materials you can use to build and who is qualified to install/build. The code sets standards for wiring and insulation, plumbing, and drainage. It states that the basement must be properly waterproofed and dehumidified. It states that you must present your basement plan before you can be issued with a works permit. A structural engineer must assess the structural strength of the supporting columns in the basement. The code defines the minimum measurements of emergency exits, corridors, windows, and doors. A basement must have at least one egress and emergency exit (EcoHome Magazine). The national electric code requires that wall sockets be placed at intervals of 12 feet. The utility room should be secured behind a grilled door. The minimum height from floor to ceiling is seven feet. Remodeling, Home, and Architectural Record states that it would cost at least $20,000 to increase the height of the Basement.
Budgeting

Remodeling is much like building a new home, which involves a lot of designing, materials, labor, transport, equipment, and paperwork. Basements require the extra task of waterproofing, ventilation, dehumidifying, and lighting. You start by asking yourself, “How should I allocate money in this project? Should I replace, repair, modify, or retain the existing design and fixtures?” If your budget is tight or you just want a minimalistic and rustic design, then you will install only the essential, functional, and non-luxury features. Grandiose plans can easily ruin your budget. Your décor must be either elegant or rustic but not both. You can reduce costs by contributing your labor, using your own transport, renting equipment, and buying knocked down kits that are easily reassembled. You need to do a project analysis in which you classify budget items according to type, use/function, price, cost of transport, and cost of labor to install. Set aside at least 5 percent of the budget for miscellaneous items like permits and insurance.
The average cost per square foot of remodeling a basement is $90 but can vary greatly with the quality and price of materials. According to EcoHome Magazine, a low-budget remodeling for a 400 square foot basement will be approximately $20,000, a moderate budget project for a 600 square foot basement will be approximately $50,000, and a grandiose project for a large basement will be from $120,000 and more. However, in this article, we mainly target Joe – the average guy – who wants to remodel a 600 square foot basement with moderate décor on a $55,000 budget.
Cost of Materials
Some of the building materials you will need are stone, cement, gravel, wood, drywalls, pipes, wires, heater, cables, dehumidifier and heat insulation, metal bars and sheets, sealants, and glass. Some of the finishing and décor materials you need are electrical fixtures, paints, carpets, tiles, sanitary fixtures, and acoustic barriers. You will also need miscellaneous items like screws, nails, fasteners, knobs, hinges, and locks, and others. In general half, the budget will go to materials.
Cost of Labor
Basement remodeling requires different professionals working under the main contractor, so you do not have to deal with individuals. The hourly rate for technicians such as plumbers, carpenters, electricians, and machine operators is around $75. The hourly rate for artisans like tile and carpet layers, masons, landscapers, and painters is $50. A general assistant goes for about $30 per hour. The carpenters are needed to do the finishing, décor, and part of the acoustics. They will also build the staircase, shelf, and cabinet units. In all, the carpenters will do 60 hours of work or cost $4500. You can speed up their work and reduce the labor charges by buying knocked down kits. The electrician will do all the wiring, electrical fixtures, and inspection. He will do up to 20 hours or cost $1500 in labor charges. The plumbers will repair and install the hot and cold water systems, drainage, waterproofing, basement sump system, and sanitary fixtures. They will spend approximately 50 hours and cost you $2500. A mason will install both external and internal waterproofing, the egress, and build the stone walls and cost approximately $2250. The tile and carpet layers, HVAC engineer, excavator operator, landscaper, painter, and a general assistant will together cost approximately $7000. The total budget for labor will therefore be approximately $17500 or 35 percent of the budget.
Cost of Transport and Plant Hire
The contractor will need to transport materials to the works site using both ordinary and specialized trucks. Semi-built stairs, glazed doors and windows, HVAC systems and several materials require specialized transport, while bulky materials like sand, stone, and gravel, and heavy machineries like an excavator and concrete mixer require large trucks to transport them. Transport and equipment rental will account for approximately 10 percent of the total budget. Personal transport could reduce the transport budget.
Cost of Finishing and Décor
Finishing the basement involves doing cosmetic fixtures that makes the basement safe and livable. Décor adds ambience and luxury to the basement without necessarily adding to its material value. Therefore, the total budget for finishing and décor varies greatly with basement functionality and personal preferences. For example a simple egress and window that costs $1500 serves the same purpose as an elaborate solar tube that costs $5000. Basic finishing includes floor tiles and carpet, wall panels/sheets, ceiling drywalls, and fixtures for electrical, water, and drainage systems. The décor uses more expensive forms of finishing, and creature comforts like lighting shades, chandeliers, blinds, and so forth. The total cost of finishing and décor in a standard basement should not exceed $7000 drawn from the materials and labor costs.
Clear the Basement
Start works by removing all movable items from the basement in order to create a safe working environment. Protect the items from rain and sun using a plastic cover. It might be a good idea to conduct a garage sale for items that will not be returned to the remodeled basement. That way you will raise some money for remodeling kitty.
Waterproofing
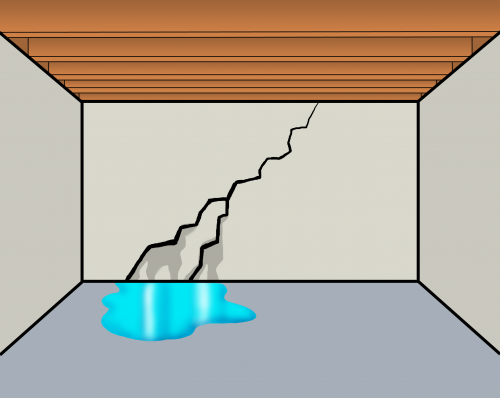
Your basement must be waterproofed before remodeling. Moisture damages the foundation and makes the basement unlivable. To identify the source of moisture leak, conduct a moisture test by sticking an aluminum foil on the wall or floor. After 24 hours, check for signs of moisture on both sides of the foil. Moisture on the top surface signifies a humid basement. Moisture on the underside signifies external water leakage. Humidity will be controlled by connecting air vents to the HVAC system. External water leakage will require a more drastic solution of draining and waterproofing. The total cost of waterproofing the basement varies between $600 and $10,000, with the national average standing at $3900. Many homeowners spend between $2000 and $6000 depending on the cause and severity of the leak (homeadvisor.com).
Interior Waterproofing
A wet or damp floor smells bad, damages the floor and walls, creates mold, and is unhealthy to live in. Moisture is caused by either internal humidity or external water from the surface or a leaking water pipe seeping through the porous wall and floor cement. If the existing drain pipe is blocked, then unblock it with a garden hosepipe or get a plumber to flush it with an augur. You will install a basement drain system along the basement floor which directs water into a sump. A pump the pumps it into a collection tank on the lawn channels it to a conventional drain channel. Humidity will be controlled by connecting an HVAC system to the basement using air vents. The cost of the interior drain system is approximately $2000 and the cost of extending the HVAC system is $600.
Walls and Floor Waterproofing
The most effective way to waterproof the basement permanently is to waterproof the walls and floor from outside and inside. External waterproofing is expensive because it involves excavating all around the house. Scrape off all paint, oil, adhesive, and sealer from all the surfaces, and clean them thoroughly with air pressure. Repair any cracks on the walls and floor by first cutting a two-inch groove and filling it with a sealant such as Quikrete Hydraulic Water-Stop Cement, Epoxy Filler or Polyurethane Caulk. Use a bubble level to check if the floor is level or sloped. If the slope exceeds half an inch, then apply a self-leveling cement. For the main waterproofing, use a Tampico-bristles brush to spread a layer of either a concrete waterproofing compound or a silicate-based concrete sealer on all the surfaces. A concrete waterproof compound adheres tightly to the cement surface, while a silicate-based concrete sealant reacts chemically with cement and seals it from moisture. Then paint the inner wall with a waterproof paint, and the outer wall and floor with a waterproof stain. It costs approximately $1800 to excavate around a 600 square foot basement, $50 to seal a 10-foot crack, $200 to spread five bags of self-leveling cement, $770 to seal with 22 gallons of the concrete waterproof compound or $990 to seal with 22 gallons of the silicate-based concrete sealant. 30 liters of waterproof paint and stain will cost $1050.
External Waterproofing
Simple measures to control external moisture include clearing debris from gutters and by extending the gutters at the downspout by at least six feet away from the wall. The extended gutter costs $15 for a six-foot plastic gutter pipe, which is durable and easy to clean. If there are cracks on the walls and floor, use a chisel and hammer to cut a groove in the crack and fill it with a sealant such as hydraulic cement or polyurethane caulk, and paint with waterproof paint. Cement costs between $20 and $40 while the paint costs $35 per liter. Build either a curtain drain or levee/crown and a moat around the house in order to channel water away from the walls. This will cost you $300 for the levee and $300 for the moat. You can waterproof the area around the house by using plastic sheets and waterproof panels that direct water into a French drain and keep the house area dry.
French Drains and Curtain Drains

A French drain or footing drain is a deep trench surrounding the house at the level of the basement floor and gently slopes away from the house into a dry well, the ground, or a storm drain. It drains away ground water. A curtain drain is a shallow trench around the house that drains surface water away from the house. The trenches are then filled with gravel so that water can flow freely through the channel. It costs approximately $1500 to construct a 20-foot long French drain using an excavator, and about $240 to construct a 20-foot long curtain drain. A curtain drain can be dug as a DIY task. You need to notify the local authorities before excavating just in case there are underground installations like electricity cables, water pipes, and sewage lines.
Inspect, Repair, and Install New Utilities
Conduct a thorough check and repair the essential utilities. Install adequate lighting for working with during the basement remodeling. Do not tamper with the mechanical installations such as the boiler, pipes, water heater, smoke furnace, and water filtering plant, you should however replace an old and fragile boiler, which is likely to break down permanently after you have finished with remodeling the basement. The electrician will inspect the wiring and replace worn out cables and connect new ducts to the main HVAC system in order to control humidity in the basement. He will create separate conduits for electric, network, and speaker cables, which will run along the unfinished wall and ceiling. A separate 20-amp fuse for electronic equipment will be added to the fuse box. Electronic gadgets are sensitive to unclean power. The electrician will install and reroute the wiring before the finishing, and install power outlets and switches, chandeliers, and light sockets on the walls and ceiling after the finishing.
The plumber will check the water and drain pipes for cracks and rust and replace worn out sections. He will insulate the hot water pipes and boiler. Install a new basement drain sump system which runs on the floor along the walls into a sump and then is pumped to the surface collecting tank. The carpenter will replace or repair the creaking staircase before it collapses under increased traffic to and from the basement. Do not move the overbearing columns that support the house. Create storage units for tools and spare items, and make a grilled door for the utility room – as per building code regulations. Repair broken window panes or, if you are going to build an egress, upgrade to a larger window with clear glazing that allows more light to seep in. The egress and window will cost $2000 to install, a drain sump system will cost $1400, an HVAC extension will cost $500, and the utility room and storage units will cost about $1400 to build. The staircase will be replaced at $2000. In all, the cost of repairing and installing the utilities will be between $2000 and $5000. A new bathroom will cost from $1100 to install while a laundry room will cost $400 to remodel.
Natural Lighting
Sunlight is healthy, brightens the mood in the house, and creates positive energy in the body. The basement is sheltered from sunlight and therefore you have to find the means to tap the light. Simple measures to tap the light and that cost less than $200 include trimming the surrounding hedges, removing blinds and curtains from the windows, and having light-colored paint, furniture, and fixtures in the basement rooms. You can create arrange curved mirrors opposite the window to reflect and scatter natural light in the whole room. Frosted doors and windows add privacy without sacrificing illumination. Besides being cheaper than solid wall partitioning, an open floor plan with glass partitions allows the entire floor to be illuminated.
Other solutions include installing natural light passages such as an egress and window, long half window, skylight above an open staircase area, a twisted fiber-optic tube, and a sun tube. The egress is a common and regulatory addition to the basement. It is a sunken pit by the wall with a window or door and which allows passage of natural light through the window or door. A large egress can have a garden that adds to the feel of the natural open space to the basement. A skylight is a glazed roof above the staircase, which allows sunlight to flood in the house and basement. A solar tube is a twisted tube from the rooftop to the basement with reflective mirrors in the tube to direct the light from the globe to the room in the basement. A fiber-optic tube is similar to the solar tube except that it uses a bundle of fiber cables to transmit light to the basement room. A reinforced, glazed basement roof allows light from upstairs to filter into the basement. A glazed staircase is both aesthetic and functional because it allows light from upstairs to filter into the basement. The cost of building a standard egress and window is $1500, a skylight is between $800 and $2000, a sun tube is $600, a fiber-optic tube is $3000, and a glazed floor is between $3000 and $6000.
Artificial Illumination
Homeowners who cannot afford natural lighting in the basement beyond the statutory regulation adopt artificial lighting. Install brighter lights where safety and visibility are important, for example in the kitchenette, corridor, staircase, library, gym, and playroom. Install dimmed or soft lights in areas where ambience is important, for example the bar, home theatre, music and art exhibition room, bedroom, and sauna. Use shades and ceiling reflectors to reduce illumination. Install automatic, low-power lights in closets and cabinets. A set of light fixtures, reflectors, and shades cost about $200 while a simple chandelier cost less than $100.
Ventilation and Energy conservation
The basement is below the ground level and therefore natural air circulation is limited. Lack of air movement results in stuffiness, high humidity, and general discomfort. Lack of direct sunlight makes the basement cold and moist. According to houselogic.com glazed windows and doors lose heat and prevent air circulation, therefore you should add a foam insulation on walls to help to lock the heat in the room.
You can create natural air circulation by opening the long windows and the egress cover, and having an open staircase area. An HVAC system creates heat and air circulation. Heat can be trapped in the room by having insulating foam sprayed between the panels, or creating air pockets between laminates, or using wooden materials on the floor. You can use insulating foam between the walls and between partitioning panels. You can keep the floor warm by finishing it with wooden tiles and a soft carpet. By installing a covered egress and window, you can trap air in the space between. Lamination helps to reflect radiation back into the basement from a laminated or glazed door and window. Energy conservation measures could add an extra $2000 to $4000 to your remodeling budget, and if you install a solar water heater to heat the floor, then the cost would rise further by $4000 or so. However, energy conservation measures would pay off in the long run because you will reduce your monthly electricity bill.
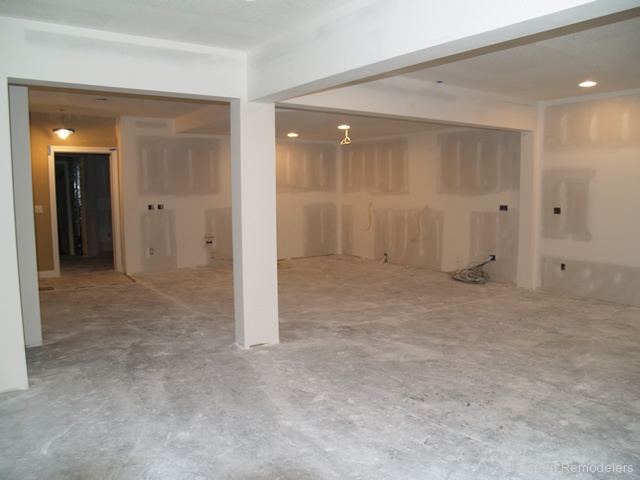
Partition the Floor Area

In the third stage, you will partition the basement space into rooms, corridors, and open spaces. The job will be done mostly by the carpenter and his assistants. The materials used include stone and timber joists for support, and brick, stone, partitioning panel, MDF, and glazing for partition walls. The staircase may be remodeled but it stays in the same location. Partitioning work takes about 60 man-hours at $70 for the carpenter and $50 for each of the two assistants. The total cost will be $3400 in labor and $2000 in materials. Plan around the staircase and your flagship project, which is mostly in a fixed location.
Wall and Ceiling Drywalls
Cover the walls and ceiling with drywalls, tiles and wall carpets. The dropped ceiling conceals the unsightly wiring and piping, and enhances acoustics in the room. The drywall is used to create a suspended or dropped ceiling supported by joists. The drywall on the wall is glued and stapled to the wall and protected from floor moisture by a waterproof spacer. Two people are needed to install a drywall, one to hold it up and another to fix it. A drywall measures 4 feet by 8 feet and costs $20, so you need to invest at least $2000 on wall and ceiling dry walling. Drywalls are acoustic, and can be painted in attractive colors.
Flooring Materials
Floors are built with concrete and wood, and finished with tiles, carpet, or stains. The floor must be waterproofed before finishing with a heat-conserving material. Concrete is durable but porous. A wooden floor is quick to build and it retain heat in the room. However it has to be built on top of a concrete foundation that has been waterproofed with a concrete waterproofing sealant. The wood also needs to be treated and waterproofed in order to prevent warping, mold and mildew, rotting, and termite attack. A carpet or wooden tiles help to keep the floor warm and acoustic. The cost of waterproofing can range from $500 to $ 2500 or more, the carpeting will cost $500 to $2000, and the dehumidifier will cost between $200 and $2000. The Environment Protection Agency and Building Code require that you ensure the basement space is dry and not too humid.
Finish the Basement
Finishing involves installing electrical, water, and drainage system fixtures and covering the surfaces with a material that hides the installations and makes the room livable and appealing. It also involves soundproofing, illumination, and décor. Separate ducts for power cables, television connections, computer and network cables, and speaker wires are fixed along the wall and ceiling. Since exposed ducts are unsightly and unsafe, you should cover them with soffit, box beams, or pass them behind the drop ceiling. The cost of covering the ducts is about $100, or you can opt for not so elegant duct fabric worth $20 (Better Homes and Gardens Magazine). Build a cabinet over the furnace, boiler, and circuit breaker box or build a utility room for them. Soundproofing will be done with acoustic barriers, while lighting will be done with bright and dim illumination. The cost of finishing will be in the range of $3000 to $5000.
You can finish the floor with carpet, vinyl tiles, ceramic tiles, hardwood blocks, laminates, and concrete. Carpeting is the most popular finishing because, according to COS Construction, it is soft, warm, acoustic, and comes in beautiful patterns. A 50 square foot carpet costs between $50 and $300 and $200 to lay it. A waterproof sheet is place underneath to protect the carpet from possible moisture leak. Vinyl tiles are resilient, waterproof, and beautifully patterned. They have to be installed on a sooth floor. Vinyl tiles cost between $500 and $1000 to install. Ceramic tiles are suitable in wet areas, like the laundry, kitchenette, bathroom, sauna, and bar. They are strong and colorful, but they require an experienced tile layer to install.
The cost of installing ceramic tile in the wet areas starts at $800. Waxed and polished wooden tiles are beautiful, warm, and homely. However wood warps when it absorbs moisture or temperature increases. It has to be used in a climate-controlled basement. The cost of laying the wooden tile in a 100 square foot area is $4000, mainly because the process of laying it is painstaking (Builder and EcoHome magazines). A laminate is a wooden block that is covered with a plastic veneer on the topside and laid over a layer of sticky foam. This method protects the wood from moisture, but it is twice as expensive as non-laminated tiles. The simplest and cheapest finishing is concrete finishing with a thin layer of cement mixed with red oxide, paint, stain, or epoxy coating. The additives seeps into the porous cement and seals it from water. However the application has to be repeat every three or four years. It costs $1000 to finish a 600 square foot basement.
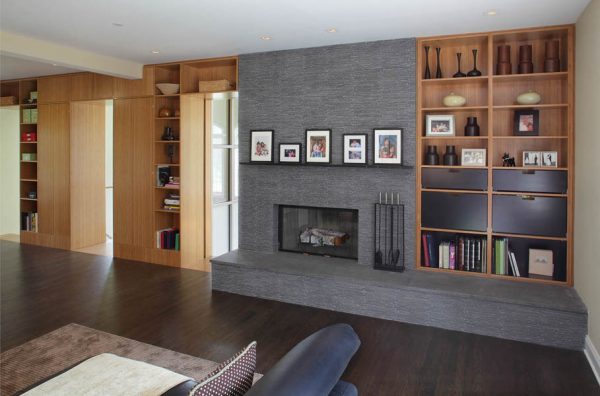
Décor and Ambience
Decoration involves putting decorative touches to the basement. The unsightly basement can be turned into an appealing sight for a cozy living space. The walls, floor and ceiling have to be covered and painted this ensures that they are protected from wear and tear, look appealing, are safer, and help to create comfort in the room. Painting gives a beautiful finish to the walls. Bright colors are used for rooms that need a lot of light while dull colors are used where soft lighting ambience are needed. The type of finishing depends on your budget, long-term plan to sell the house or keep it, and what your priority for extra space is. May be you want an extra bedroom, an entertainment center, or a utility room. Decorative items such as wall picture frames, window curtains, and light shades will add to the basement’s ambience. You want to give your new basement a touch of class and coziness. This involves doing the natural lighting, artificial lighting, and soundproofing. Ambience is created by reducing illumination, installing chandeliers, and doing a decorative finishing and painting. Curtains, blinds, screens, louvres, and window tints reduce natural light and increase the room ambience. Shades, dimmers, and low-power bulbs minimize artificial lights. Dull colors and paints on furniture and walls absorb light and enhance the calm feeling. You will spend $200 on paint, $100 on renting a paint sprayer, and $300 on labor. The cost of décor and ambience can be as low as $500 and as high as $3000.
Soundproofing

If you have an entertainment center, music room, or a gym in the basement, you will need to soundproof the rooms. You can also soundproof the windows and doors to keep out street noise. Acoustic barriers are soft and fluffy paddings added on the walls, roof and floor in order to absorb the sound that would otherwise cause excessive vibrations on walls. The acoustic barriers include carpets and rugs, medium density fiberboards (MDF), drywalls, fiberglass, and vinyl sheets. For a 32 square foot area, an MDF panel costs $32, a drywall panel costs $20, an acoustic carpet costs $50, and a dense vinyl costs $75. Storyk Design Group of New York states that while a standard windows block about 20 percent of noise, an acoustic window blocks between 85 and 95 percent of noise. Windows are soundproofed by laminating them with a thick layer of clear plastic or creating a vacuum between panes. A standard-sized acoustic window costs $950 from CitiQuiet, and $7000 to $8500 from Zeluck. However, for the ordinary homeowners, acoustic windows are way too expensive and there are other unavoidable routes by which sound enters the house. Gannett News Service advises that you stick to rugs and drywalls.
Basement Remodeling Ideas on a Budget: Tips to Save Efficiently
Below, we’ve outlined some quick, inexpensive, and relatively easy ways to spruce up your basement space and get the most out of all of your square footage.
Ceiling
Exposed
Believe it or not, the ceiling is one of the most important fixes you can make. The right ceiling design can create a tremendous amount of dimension to the close quarters in basements that can often feel claustrophobic.
One of the biggest mistakes people make in basement remodels is using classic basement materials, and nothing screams finished basement like a drop ceiling. Unfortunately, it is also very widely accepted as a cheap, industrial look, something you would find in an office building or a doctors office accompanied by hot white fluorescent lights.
But there is a way to class up your basement and add depth to the room that is actually more cost effective than adding a drop ceiling, and definitely more appealing, and that’s no ceiling at all.
Leaving those beams and joists exposed can really bring out the Brooklyn, rehabbed factory vibe that is so popular in apartment buildings and contemporary work spaces all throughout metropolitan areas in America. However, not everyone’s basement ceiling framework is naturally sharp. Often times beams are sistered, marked, and cut at odd angles to fit in corners and around impediments. You can usually find some oddly ran conduit or copper piping, and worst of all, insulation.
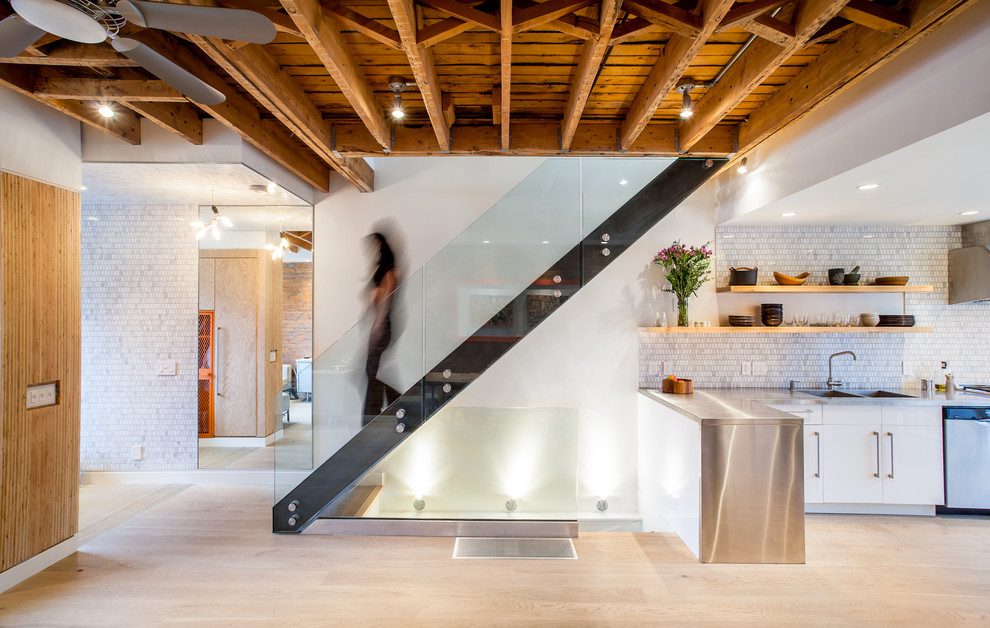
Cleaning up all wire and pipe mazes with straight runs will help a lot and is likely something you would want to do anyway to ensure all your electric and plumbing is up to code. You could also throw a coat of paint over the wood framework to create a consistent look and clean up the faces of some of those old and married beams. Finally, you can seal insulation with thin veneer, or if you’re into a true industrious look, leave the metallic peel paper on the underside of the insulation facing the basement room.
Walls
Leave ‘em be…
Like the exposed ceiling, the basement of an old house might mean concrete or even stone and mortar walls. As long as the mortar is not compromised to the point that it leaks rain water, these original wall structures can add an awesome traditional aesthetic to your new basement room.
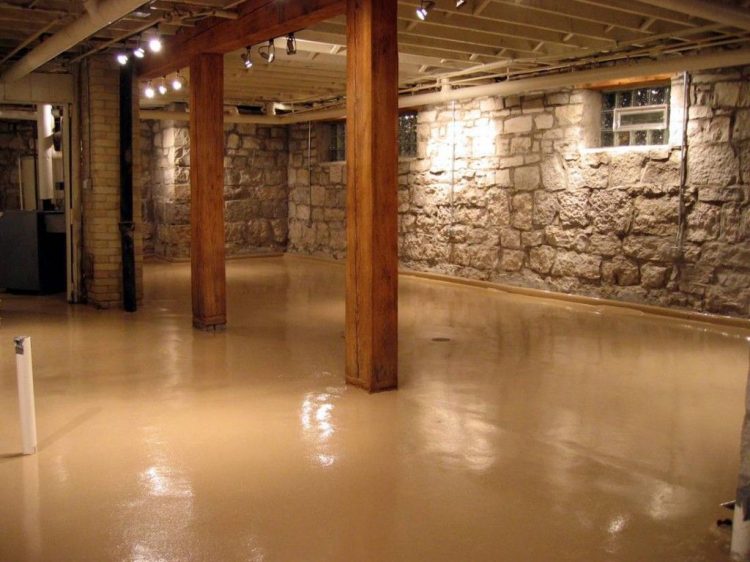
In fact, even if those walls have seen better days (like in 1920 when they were more widely used) a little chiseling, mixing, and new mortar pointing is a pretty manageable task, even for a novice DIYer.
Frame it yourself
Obviously highlighting the natural walls is the most inexpensive option, but often homeowners seeking to remodel their basements are doing so to create space that really feels like an extension of the main living areas. In this case, you will want something that feels more like real walls.
Obviously, drywall is always an option, but there is a reason why there are labor unions specifically dedicated to building walls. Namely, it can be pretty tricky. If you’ve worked with drywall before, it is totally worth the smooth finished, easily paintable product, but there are also some decent alternatives that are slightly less nuanced in terms of installation.
Regardless of what you put up though, you are going to have to frame. The beauty of framing a basement is that it studs don’t HAVE to be 16 ½ inches on center. Really, you just need to frame in a way that works for you and your space so that you have something to secure your wall surface too.
Here is what you’ll need for build out your framing:
Frame board – You can use either two by fours or two by threes. What you choose is mostly about personal preference. Basically, going with the smaller board can save you a few inches of livable space once your walls are up.
Masonry nails – You can’t use any old nail to frame, what is essentially the inside wall of your concrete foundation. You’ll need a heavy duty masonry nail, and it will not go in easy. This is probably the most difficult part of the project.
Insulation – This is that pink, foamy stuff sold in giant rolls. Stuffing some of this in the spaces in between your studs will do wonders to keep your basement feeling warm and dry and not…well, like a basement.
In terms of alternative surfaces, there are a lot of options. Obviously, sheet rock is the most popular and will provide the most finished look, but it can also be the most labor intensive. A four by eight-foot piece of drywall goes for about $9. However, in addition to the sheet rock itself, you will need to purchase drywall tape, compound, specialized drywall screws, as well as all the necessary tools for the various part of the job. This can become costly, and quite frankly, it’s easy to mess up, driving the cost even higher.
Panel board is a more accessible option. You can find paneling in a variety of styles, from plain white to more decorate patterns like faux brick or wood. While it runs a little more expensive (about $10-$15 for a two by four-foot sheet), putting up paneling does not require as many subsidiary materials or as much skill. It’s basically a cut to fit wall surface that goes right over your studs and insulation.
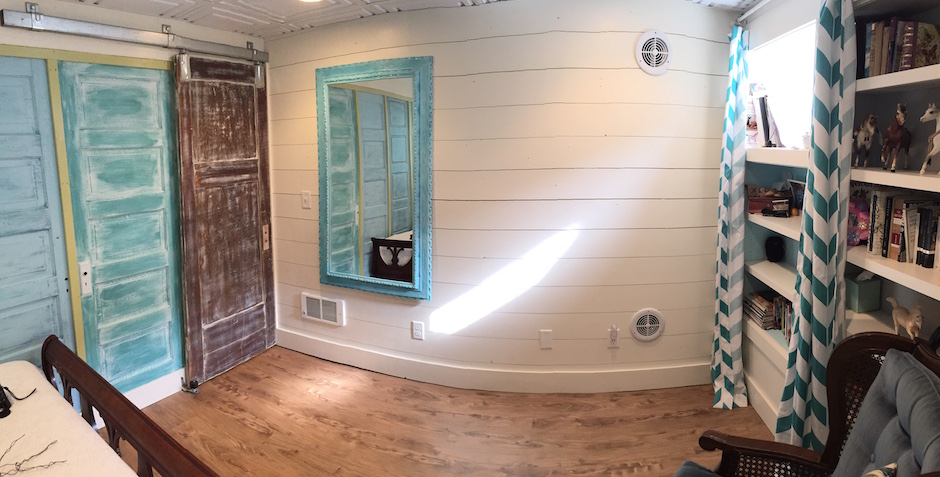
A third option, and one of our personal favorites is barn board. Barn board commonly referred to as shiplap, has been popularized by home improvement television shows like Fixer Upper for the historic aesthetic it provides. You can buy kits at any home improvement store, but these can be a bit on the pricey side. Your best option, especially if you plan to paint, is to try and get your hands on some reclaimed wood of the same or similar grain and cut it to your preferred length.
The downside to barn board walls, is they can appear busy. This is why they are often used as accents rather than fundamental wall surfaces.
When putting up barn board, you will want to run each piece horizontally. You can stagger the boards like elongated tile or align them. This is really a stylistic choice, however the latter will leave a more pronounced seam. When tacking up your barn board, it is helpful to have a nail gun, as each board will need to be secured at four points. Needless to say, that is a lot of nailing if you’re doing it by hand.
White or Light Paint
Regardless of what you choose as your wall surface, for a basement, it could be helpful to go light. This will create that brightness that is often elusive in basement rooms that lack windows, and thus, natural sun.
If you’re painting directly on concrete, which is a perfectly viable option, make sure to use masonry paint that has a sealant built in. Otherwise, the paint is likely to chip and flake off pretty quickly.
Flooring
Painted Concrete
When it comes to flooring, there are even more cost-saving options than for the ceiling or walls. If you’re really trying to stretch your dollar, you can always paint your concrete basement floor with the intention of throwing down some area rugs to warm the space. The rugs are not a necessary component, but will certainly help you turn your space into one where people will feel comfortable and less like a basement. It also allows you to bring some of your design chops to the table as you select a rug design that reflects your personality and the style you have built throughout the rest of your home.
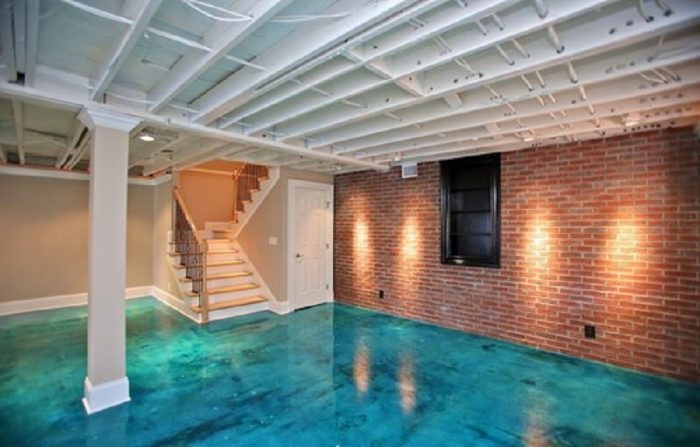
Area rugs over concrete also help protect the extremely vulnerable painted concrete floor. Like the walls, you will want to use a specialized paint for concrete, but because of foot traffic, even a good masonry paint is bound to chip and flake.
There are also some products on the market that operate like paint for concrete floors but add a protective element. Think of these as epoxy more than paints, typically used for garages and other wet spaces. These come in clear coats or textured coats and while they can be pricey, (ranging from $200-$300 for a five-gallon drum) they have a pretty long lifespan of upwards of five years.
Laminate
Speaking of life spans, when it comes to flooring, you’ll get the most bang for your buck out of a laminate. Laminate flooring is typically tongue and groove planks made of composite materials that you can find to match the design of pretty much any raw flooring material you can imagine. Laminate flooring is pretty easy to install once you have your space mapped out. Like any solid flooring material though, there will almost certainly be some cuts that you’ll have to make to fit corners and edges. You will also need to lay a subfloor.
At any home improvement store, you will be able to find subflooring materials that are designed specifically for moist areas like basements. These will help to keep your flooring dry and protect against mold. It is important to make sure your floor surface is dry and clean before laying anything down. Other than the subfloor, and the laminate itself, there isn’t much else required. The planks will snap together and fall into place as you are working.
If you’re feeling ambitious, there are typically caulk like products sold to match laminates, and you can squeeze a bead in between the joints of the flooring to create a more finished and professional look. A typical kit is sold in 40-50 square foot sections at about $1.50-$3 dollars a square foot.
Conclusion
If you work on a limited budget then look for ways of cutting down on various costs. For example, you should buy standard yet functional materials and fixtures from bargain hardware stores. You can save on labor costs if you buy knocked down kits that are easily reassembled. Unless you are skilled and have plenty of free time to do the remodeling yourself, you are better off shopping around for an affordable contractor. The National Association of Realtors® estimates that the cost of remodeling a square foot of basement on average is $90, therefore a 20-foot by 30-foot basement with a playroom as its flagship project would cost at least $54,000 to remodel. However, even after five years the house will retain its resale value at about 70 percent.