
Transform Your Space with Tongue and Groove Ceiling Planks
Have you ever found yourself yearning for a beautiful and unique way to transform your ceiling? You’re not alone, as I too was once in that spot. That’s when I discovered one of my favorite renovation secrets: the Tongue and Groove Ceiling.
This article will demystify everything about this design technique, from understanding what it is to tips on how to install it effortlessly. Ready for an interior makeover with a difference? Let’s dive right in!
Key Takeaways
- Tongue and groove ceilings are an excellent option for paneling walls and ceilings, adding a touch of classic farmhouse aesthetics to your home.
- They offer a stylish appearance, versatile design options, and easy installation methods.
- Different styles and installation methods are available, allowing for customization to suit any decor.
Understanding Tongue and Groove Ceiling
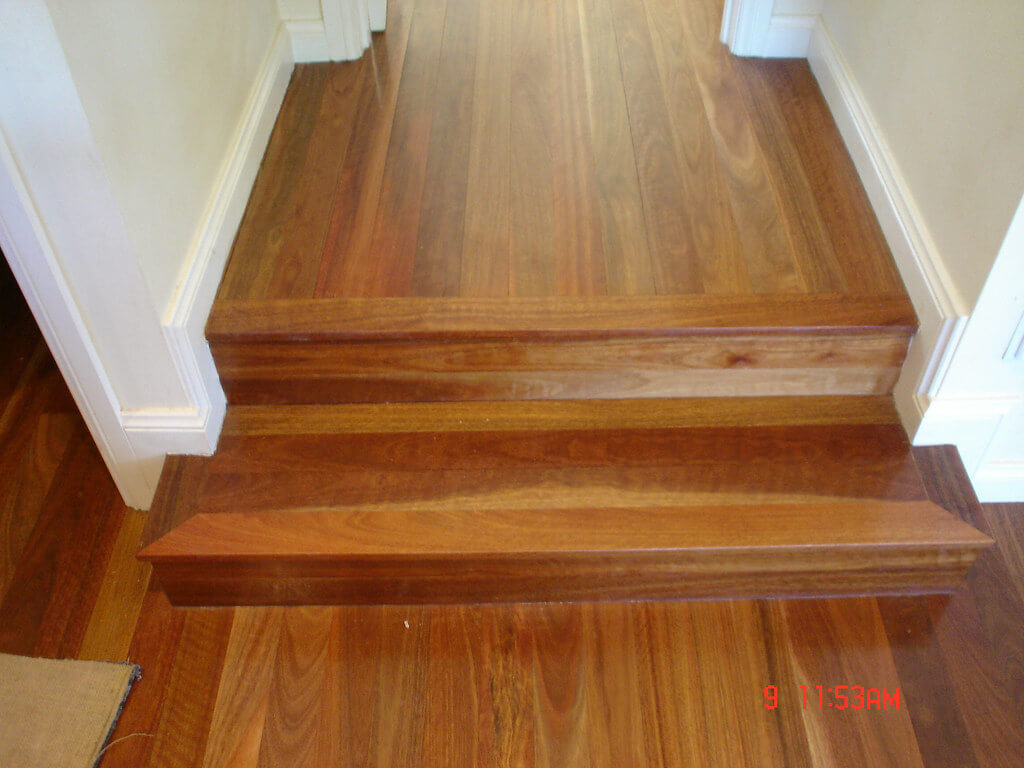
Tongue and groove boards form an excellent option for paneling walls and ceilings. These durable, economically viable additions bring a touch of classic farmhouse aesthetics to your home while also adding architectural detail.
Tongue and groove ceiling is assembled using interlocking boards with a ‘tongue’ on one edge fitting into a ‘groove’ on another edge. This connection creates a smooth, structured surface that’s visually appealing.
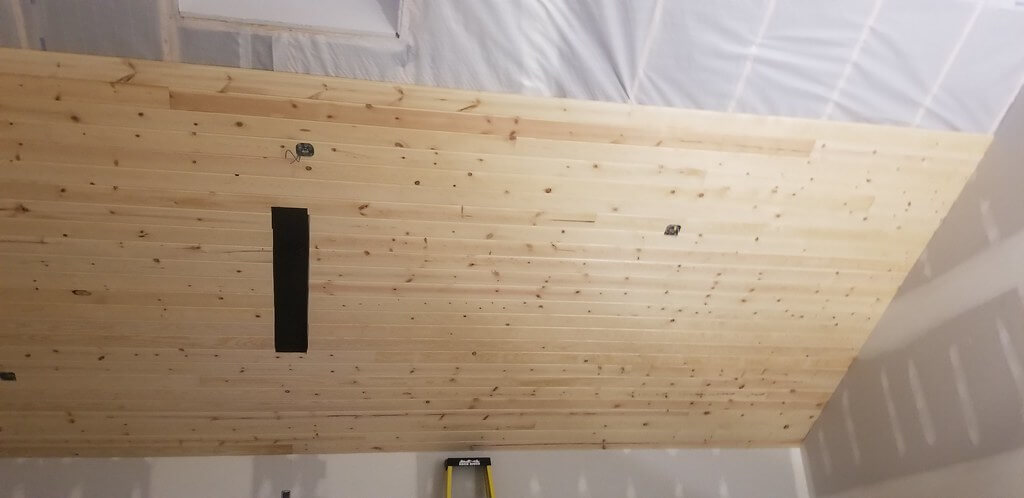
It’s pretty convenient how these boards can fit over various surfaces from bare framing to plaster or drywall. Usually chosen are spruce tongue and groove boards measuring 1×6 or 1×8, though other materials are available as well.
Interestingly enough, they might feature different textures on each side – rough on one for that rustic charm, smooth on the other for chic modernity! Before installing them onto the ceiling or wall, it’s usually advised to finish the boards first.
Benefits of Tongue and Groove Ceiling
Tongue and groove ceilings offer a stylish appearance, versatile design options, and easy installation.
Stylish Appearance
Tongue and groove ceilings instantly elevate the look of any room. Their sleek lines and smooth finish add a touch of elegance that’s hard to beat, giving your space an air of sophistication.
Different ceiling plank options allow you to customize the aesthetics as per unique needs or individual taste. For instance, WoodHaven planks come in colors like Natural Cherry, Classic White, Woven White, and Driftwood Gray.
These planks can even be painted to match other interior elements such as walls or floors for a coordinated appearance. If larger planks are desired for more impact on the overall design scheme, Armstrong Ceilings Country Classic Plank provides just that – added size without compromising style.
With these diverse choices available at Lowes.com, picking out Tongue and Groove Ceiling becomes less about functionality and more about personal style expression.
Versatility
Tongue and groove ceilings hold a unique appeal due to their versatility. The boards adapt effortlessly to any room design, from traditional to contemporary. They can be installed on bare framing, plaster, or drywall for a tailored look that suits your style preference.
You’re not restricted to one finish either – pre-finishing the boards in various colors, including classic white for a shiplap ceiling effect, opens up an array of design possibilities.
Moreover, the installation process is flexible as well with options like using 1×2 battens for uneven ceilings or opting for blind-nailing for seamless aesthetics.
Easy Installation
Installing a tongue and groove ceiling is a straightforward process that can be completed with ease. The planks can be easily installed directly to the ceiling joists using clips, screws, furring strips, or an existing drop ceiling grid with Easy Up clips.
They can also be installed directly to an existing ceiling or joists using Easy Up tracks and clips or adhesive. With detailed installation instructions provided by Armstrong Ceilings for their WoodHaven and Country Classic planks, you’ll have all the guidance you need to complete the installation in just a weekend.
Additionally, helpful installation videos are available for WoodHaven Ceilings with Easy Up tracks and clips. Installing a tongue and groove ceiling has never been easier!
How to Install a Tongue and Groove Ceiling
Installing a tongue and groove ceiling is a straightforward process that can be done by following these simple steps. Read on to learn more!
Preparation of Tongue and Groove Boards
To prepare the tongue and groove boards for installation, start by ensuring that they are clean and free from any dirt or debris. You can use a soft brush or cloth to wipe them down if needed.
Next, inspect each board carefully for any defects such as knots or cracks. If you come across any damaged boards, it’s best to replace them before proceeding.
Once you have your boards ready, it’s time to measure and cut them to the desired length. Use a tape measure and a saw to ensure accurate cuts. Remember to leave some room for expansion when measuring the length of the boards.
After cutting the boards, sand down any rough edges or surfaces using sandpaper. This will help create a smoother finish on your ceiling once installed.
Starting with Battens on Finished Ceilings
To create a solid base for installing tongue and groove boards on finished ceilings, I recommend starting with battens. These 1×2 strips are installed directly onto the existing ceiling surface, providing a nailing surface and helping to even out any uneven areas.
Not only do battens enhance the overall appearance of the ceiling, but they also allow for easier installation of the tongue and groove boards. Additionally, when painted, battens can create a white shiplap ceiling look that adds a touch of rustic charm to any space.
To ensure neat and seamless joints between boards, consider recutting board ends and adding a chamfer before installing them onto the battens.
Blind-nailing the Tongues
I blind-nail the tongues of the tongue and groove boards to create a seamless and polished look. This involves driving nails through the tongues, which hides the nail holes from view.
To do this, I use a brad nailer with 2-inch nails or an 18-gauge nailer. As I install each board, I tap them together using the side of the nailer to help seat the tongues and grooves tightly.
This ensures a secure fit between each board and eliminates any gaps in the ceiling. However, if there are areas where a board can’t fit into the previous joint, like at protrusions or as the last piece, I break off the groove flanges and face-nail it for stability.
Managing Butt Joints
Butt joints are the areas where two tongue and groove planks meet end-to-end. To create a visually appealing pattern, it is recommended to stagger these butt joints. If necessary, the planks can be cut to fit at the butt joints using a saw.
For added strength and stability, adhesive can be applied to the butt joints before securing the planks with screws or nails. Managing these butt joints properly ensures a seamless and professional-looking tongue and groove ceiling installation.
Dealing with Cutouts
Dealing with cutouts is an important aspect of installing a tongue and groove ceiling. Cutouts are necessary when there are obstructions such as light fixtures or air vents on the ceiling.
To deal with cutouts, you will need to measure and mark the location of the cutout on your tongue and groove boards. Then, you can use a jigsaw to carefully cut along the marked lines.
Remember to take safety precautions while using power tools. Once the cutout is made, you can fit the board into place around the obstruction, ensuring a seamless look for your ceiling.
Finalizing the Joints
To finalize the joints in your tongue and groove ceiling installation, there are a few important steps to follow. First, make sure all the boards are securely attached and aligned properly.
Then, use a wood filler or putty to fill any gaps or cracks between the boards for a seamless look. After that, sand down the filled areas until they are smooth and even with the rest of the ceiling.
Lastly, apply a coat of paint or stain to match your desired finish and protect the wood from moisture and wear. With these final touches, your tongue and groove ceiling will be ready to impress with its polished appearance.
Tongue and Groove Ceiling Plank Options
There are various styles and installation methods available for tongue and groove ceiling planks, allowing for a versatile and customizable look.
Different Styles Available
Tongue and groove ceiling planks offer a variety of styles to suit any decor. From rustic pine to classic white, there is a style that will enhance the overall look of your space. Whether you prefer a more traditional or modern aesthetic, there are options available to achieve the desired effect.
These different styles allow for customization and can help create a unique and stylish appearance in any room. With so many choices, you can easily find the right style that fits your personal taste and complements your home’s interior design.
Variety of Installation Methods
There are several different ways to install a tongue and groove ceiling, depending on your specific needs and preferences. Here are some options to consider:
- Directly to Ceiling Joists: WoodHaven planks can be installed directly to the ceiling joists using clips and screws. This method provides a secure and durable installation.
- Over Furring Strips: Another option is to install the planks over furring strips. These strips create a level surface for the planks to be attached to, making installation easier.
- Over Existing Drop Ceiling Grid: If you have an existing drop ceiling grid, you can install the WoodHaven planks over it using Easy Up clips. This allows for a quick and convenient installation without having to remove the existing grid.
- Easy Up Tracks and Clips: Country Classic planks can be installed directly to an existing ceiling or joists using Easy Up tracks and clips. This method provides a straightforward installation process.
- Adhesive Installation: Alternatively, you can choose to install Country Classic planks using adhesive. This method eliminates the need for visible hardware and creates a seamless look.
- Wainscoting on Walls: In addition to being used on ceilings, WoodHaven planks can also be installed as wainscoting on walls. This adds a touch of elegance and charm to any space.
Overview of Other Wood Look Articles
Lowe’s offers a wide range of wood look articles that can complement your tongue and groove ceiling. From shiplap to other types of wood paneling, there are various options available for you to create the desired aesthetic in your space.
These products come in different styles, installation methods, and price points, allowing you to find the perfect fit for your project. Whether you prefer a rustic or more traditional look, Lowe’s has got you covered with their extensive selection of wood look articles.
Conclusion
In conclusion, tongue and groove ceilings are a fantastic option for adding style and versatility to any space. With easy installation methods and a variety of plank options available, it’s no wonder that this trend is becoming increasingly popular.
Whether you’re looking to achieve a rustic or traditional look, tongue and groove ceilings offer the perfect solution for creating a beautiful and seamless finish in your home or office.
So why wait? Upgrade your ceiling today with tongue and groove planks!
FAQs
1. What is a tongue and groove ceiling?
A tongue and groove ceiling refers to a type of ceiling installation where planks or panels are fitted together with interlocking edges, creating a seamless and visually appealing finish.
2. What are the benefits of a tongue and groove ceiling?
Tongue and groove ceilings offer several benefits, including enhanced aesthetics, easy installation, durability, and the ability to hide wires or imperfections in the ceiling surface.
3. Can I install a tongue and groove ceiling myself?
While it is possible to install a tongue and groove ceiling yourself if you have the necessary tools and skills, it is recommended to hire professionals for best results as they can ensure proper alignment, stability, and overall quality.
4. What types of wood are commonly used for tongue and groove ceilings?
Commonly used types of wood for tongue and groove ceilings include pine, cedar, cypress, oak, maple, or mahogany. The choice of wood depends on personal preference regarding appearance, budget considerations, and desired level of durability.