- No Obligations
- Stop Paying Too Much For Your Contractor
- No Spam Calling
- Screened & ID Checked Contractors only!
What You Need to Build a Faux Fireplace
0
 What You Need to Build a Faux Fireplace
earlyexperts.net
What You Need to Build a Faux Fireplace
earlyexperts.net
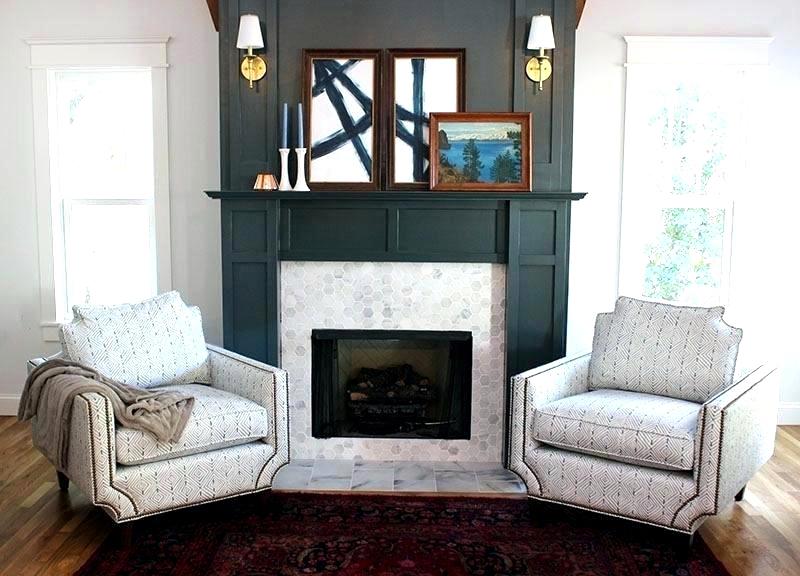
There is something truly magical about a fireplace in the home. Perhaps it is the idea that at one point in history this is truly how people stayed warm in winter months. Americans love that nostalgia and to pay homage to the past by adapting classic home design to modern decor. Nowhere is this more evident than in the prevalence of this phenomenon in seemingly all major home and garden programming.
While certainly you cannot beat a real, wood burning fireplace for the mood and ambiance it sets in your den or living area, for some homeowners looking to capture the aesthetic, it is just not doable. The fact of the matter is, some contemporary houses just do not have brick fireplaces.
That does not mean these homes do not have chimneys. In fact, they likely do. However, tying into the chimney with a traditional hearth and fireplace can be extremely costly.
This should not completely discourage you from the playing off of a fireplace focal point in your own furnishings, though. There are ways to fake it till you make it, for lack of better verbiage.
Faux fireplaces can be created through a cooperation of decorative elements that when fastened to an existing wall, create the illusion of an authentic wood burning opening. And with a sound forced air or baseboard heating system, why not?
The faux fireplace is a viable route that will give you all the aesthetic value of the fireplace you will ever need without breaking the bank. Here is how to do it and everything you’ll need to make it work.
Materials List:
While some of these tools are interchangeable with others, here is a list of suggested items to make the project go as smooth as possible.
- Ready made mantel
- Paint stripper
- Chemical resistant gloves
- Scraper
- Paint brush
- 3 sheets of plywood
- 9 2 x 4 boards
- Carpentry nails
- Finishing nails
- Drywall screws
- Measuring tape
- Pencil
- Circular saw
- Hammer
- Power drill
The Mantel
First and foremost, you will need a mantel. With the emergence of Facebook marketplace as a one stop shop for all things reclaimed, this should not be too hard. You could also try architectural salvage warehouses.
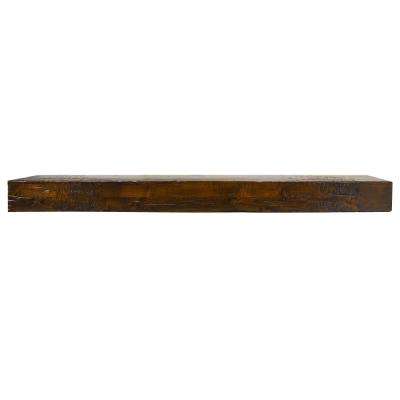
Once you have yours, depending on its state, you will need to strip the old paint and start fresh. Use the paint stripper and gloves to get the mantel down to a clean slate. Apply the paint stripper with a brush and let sit for twenty minutes. Then, when the paint begins to bubble up, use a paint scraper to remove the old paint. One coat should do the trick, but always be prepared for a couple of coats.
After it is clean and has sat to dry you can prime and paint to your liking. White is traditional and always a fan favorite for fireplace mantels. Use a matte finish paint for a more rustic look. You can also distress the wood for an extra traditional feel.
Find the Perfect Place
Once the mantel is ready to go you will need to find a spot in the room that is both large enough and central so that your fireplace can play its part as the focal point of your living room aesthetic. Mark where the mantel will sit by measuring evenly from each end to the next edge on the wall, whether that be the wall itself or a window or door casing.
Framing the Hearth
Next, you can start to frame out a hearth. Cut two long 2 x 4’s to about 8 inches longer than the manten itself. These will outline the length of the hearth. Connect these to two 24 inch pieces, creating a rectangular base.
You should then reinforce the hearth frame with two more 24 inch 2 x 4 ‘s so that they are evenly distributed across the base frame. Use carpentry nails to fasten the frame.

When the frame is finished, line it up to the base of the wall, centered over where the mantel was marked. Nail the backboard that braces the length of the hearth to the base of the wall. If you wall has a baseboard, you may need to cut it out to fit the hearth so that the hearth frame and sit flush and even to the wall.
For the top of the hearth, rip the plywood sheet to fit the top of the hearth frame and nail it in with the same carpentry nails used to fasten the frame itself.
Hanging the Mantel
To hang the mantel, you are going to need some anchors. Use three 2×4’s, secured to both vertical sides and the horizontal top of the mantel’s backside and mimic these with corresponding 2×4’s at the same height and width on the wall.

There should be roughly an inch and a half of overhang from the 2×4 coming off of the mantel and the wall. You will use this space to fasten a three ripped pieces of plywood enclosing the sides and top of the mantel and wall frame. You can use whatever width of board you choose to do this, but 3 to 4 inches is probably sufficient.
That said, ripping plywood is hard, so feel free to use 1×3/4 pine or common board for this part of the project.
The Plywood Backing
Before you fasten the mantel as described above, you will need to install a piece of plywood that will act as the canvas for whatever fireplace scene you want to broadcast within the mantel opening. Cut the plywood to fit snugly over the opening using a circular saw and fasten to the mantel itself with wood screws that are short enough as to not piece through the mantel’s front facade.
The Faux Hearth and Chimney
With the plywood backing secure and the mantel hung by the 2×4 anchors, you can begin to think about the details.
First, you will want to mark the opening at the center of the mantel (i.e. the space where the wood would burn if it were a real fireplace that is surrounded by brick). Leave roughly a 8 inches of “brick space.” You will fill the faux opening itself in later with real log ends, but want to create the masonry design first.
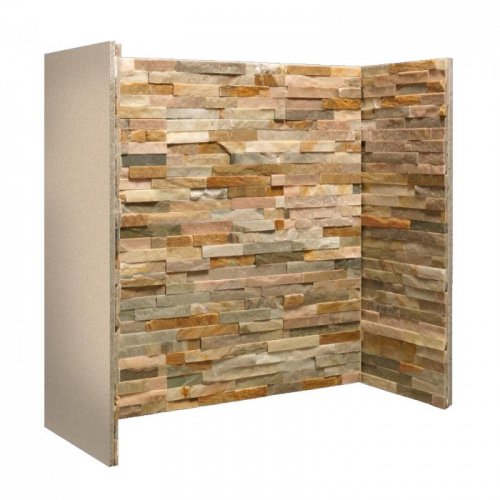
Masonry detailing will go on the hearth and the mantel center surrounding the faux opening. You can certainly use real brick and mortar, but there are panel board brick finishes as well. To keep the overall faux fireplace from leaning towards tacky, we suggest going with real stone. It isn’t going to cost much more, to be honest, but will certainly require a little more work.
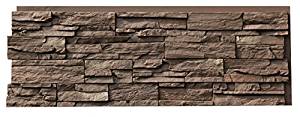
One good option for the brick work is AirStone, which are small, easy to work with blocks that won’t weigh so heavy on the framing you have built. You can use the AirStone on both the backing and the hearth to create a more uniform look or vary the look using regular red brick faces for what would be the chimney.
One reason AirStone is preferable is because it comes with its own brand named adhesive that is sure to give you a strong, secure hold. Simply apply the adhesive to the back of the stone evenly and press to wood surfaces of the wood frame and the plywood backing of the opening.
It is a good idea to plan your design and number your bricks before hand. This way, you will have to make significantly fewer cuts.
For the top of the hearth, or the hearth surface, you can use really anystone you want. This is because it is sitting atop the frame and wont be pulling its weight on the wall and frame like the AirStone would. Garden stone like those used for walkways is a wood idea here.
Again, these garden stones are heavier and wont be getting any traffic so the AirStone adhesive should be enough to keep them in place.
The Faux Fireplace Opening
For the opening itself, the spot where would would burn, we are going to outline a stacked would design. This is the most popular of faux fireplace styles because it allows for authentic wood to be incorporated.
First, paint the section of the plywood backing that has not become chimney a dark color. Chalkboard paint is great for this because of its supremely matte finish. Next, you need only get your hands on some real logs.
Cut the logs into one and a half to two inch slices and glue them flush to the faux opening with gorilla glue.
Video Resources
Conclusion
With the log slices glued to the faux opening, you are pretty much all set. Now is where your own personality can be brought into the project as you decorate and accent accordingly. All in all, the faux fireplace is nothing to sneeze at in terms of the do-it-yourself chops required. There are alot of moving parts and really three full phases of the project.
First you must frame and hang, which is arguably the most important and most difficult part. Then, there is the masonry work. This is mostly tedious and messy, but not all that hard. Finally comes the finishing: how you choose to decorate your faux opening and mantle. This is where the craft experience and vision comes in.
Before you undertake such a project, it is important to audit your abilities. Certainly the brick work and finishing are doable, but it is necessary that you or someone you are entrusting with the task, is confident with their carpentry skills and has a basic understanding of structural integrity when it comes to wall frames.
Really though, you won’t know until you try. If you feel like the only thing your house is missing before it can truly be your dream home is a fireplace, then we encourage you to go for it. With the above outline, you definitely have the tips and information you need. The rest is a matter of trial and error. Good luck!
Most Read


Dry Erase Paint for Wall Painting Projects
Oct 05, 2018

Tips and Hints to Maintain Your Home Appliances
Apr 06, 2021