Laminate Flooring Installation Cost Guide
Read our laminate flooring installation cost guide; we included all the costs associated to renovating, replacing or installing laminate flooring.
Imagine walking into a neat-looking room where the floor is perfectly colored or just imaginatively textured, and its patterns are so believably natural wood. Overall the floor is totally harmonized to the overall room décor. Imagine a floor that does not echo with every step as with a ceramic tiled floor, but instead feels soft underfoot. And now imagine you can clean an entire floor in just a few minutes leaving it gleaming like new. Now imagine this is not the real thing but it comes close – we are talking about laminate flooring. In matters construction nothing beats the good old natural wood, especially hard wood. The next best thing to natural wood is the semblance of the natural wood – faux wood. Laminate flooring is one of the best ways to create that look. The laminate flooring or floating wood is a synthetic flooring made from multiple layers of different materials which are a melamine base, a thin printed paper with natural wood-like patterns, and a clear and hard resin on top. It is engineered to look like natural wood and is preferred to carpet because it has clear and realistic patterns.
Quick Cost Guide
All laminate flooring are elegant-looking, comfortable, and warm. Their prices are mostly informed by the thickness of the laminate where the standard sizes are 8mm thick for the low-end market, 10mm thick for the medium market, and 12mm thick for the higher-end market. The 8mm laminate flooring is inexpensive and still looks elegant. It is however less durable. The 12mm thick laminate flooring is durable and comfortable to walk on. Apart from thickness, brand name also plays a part in the cost of the laminate flooring. Some of the well-known brands and the cost of the product are given below.
| BRAND | SIZE | COST/ SQ. FT. | ATTRIBUTES |
|---|---|---|---|
| Equestrian Collection | 8mm | $0.59 | American Quarter Horse |
| Toklo Equestrian Collection | 8mm | $0.74-$0.79 | Cleveland Bay |
| Modern Wide Plank Collection | 8mm | $0.84 | Dark Chocolate Brown, |
| Modern Wide Plank Collection | 8mm | $0.89 | Marble Gray |
| Modern Wide Plank Collection | 8mm | $0.89 | Ash Blonde, Ash Brown, Cement Gray, or Sand Gray. |
| Toklo Ancient Spice Collection | 12mm | $1.09 | Ancient Spice Collection |
| Elite American Collection | 12mm | $1.09 | Roasted Brown |
| Elite America Collection | 12mm | $1.19 | Natural Grain, Cloudy Day |
| Lamton National Parks Wide Board Collection | 12mm | $1.29 | |
| Craftsman Distressed Collection | 12mm | $1.39 | Taylor |
| Rustica Reclaimed Collection | 12mm | $1.39 | Barcelona |
| Exotic Wide Plank Collection | 12mm | $1.49 | Papua Ebony |
| Rustica Reclaimed Collection | 12mm | $1.49 | Paris |
| Rustica Reclaimed Collection | 12mm | $1.59 | Berlin |
| Russian Collection | 12mm | $1.59 | Odessa Grey |
Water Resistant Laminates
Although all laminates are by design water-resistant, they can be damaged by stagnant pools of water, therefore laminates are mostly not recommended for wet areas, and when a spill occurs, you have to wipe the wet patch dry quickly otherwise it might infiltrate through the joint between planks. However, there are laminate floorings that are deliberately and specially designed to be water-resistant. They are installed in a powder room, foyers, and even kitchens. Examples of laminate flooring include;
| BRAND | THICKNESS | MANUFACTURER | COLOR | COST/SQ. FT. |
|---|---|---|---|---|
| Saison Laminate Collection | 12mm | Saison | Auburn | $1.29 |
| Saison Laminate Collection | 12mm | Saison | Twilight | $1.29 |
| Saison Laminate Collection | 12mm | Saison | Grey Naples | $1.29 |
| Saison Laminate Collection | 12mm | Saison | Mocha | $1.29 |
| Legendary BIG board Collection | 12mm | Legendary | Royal Blanca | $1.59 |
| Legendary BIG board Collection | 12mm | Legendary | Simply Taupe | $1.89 |
Quick Assessment of Laminate Flooring
Laminate flooring is not natural wood. It comes in many patterns, but homogenous quality, pricing, and base material. It is however very affordable and gives a good finish to the floor. A quick comparison of attributes is given below.
| FEATURE | PROS | CONS |
|---|---|---|
| Installation | Fast and easy, few materials and tools are needed No glue as parts click and lock into each other Easy to cut into smaller pieces | Higher risk of moisture leak through the seams of the click and lock system Warps if not properly installed and acclimated The top wear layer is easily damaged by chemicals |
| Cleaning | Easily cleaned with a broom and vacuum cleaner or slightly damp mop | Seeps water through the seams, causing bloating Needs special laminate cleaner |
| Durability and Maintenance | Resistant to dents and scratches Resistant to stains | Cannot be repaired by sanding The entire floor must be redone |
| Moisture barrier | Suited to dry floors and slightly wet areas like the powder room | Easily damaged by standing pools of water, especially in wet areas |
| Functionality | Easy to stand on especially with a spongy underlayment | Slippery and attracts static electricity |
| Resale Value | Deep embossed texture improves quality and ROI | Low cost material and faded gleam lowers the ROI |
| Appearance | Elegant natural wood-like appearance Uniform quality of all planks | Fading colors and patterns Few choices of patterns Staggered pattern if poorly installed |
Structure of a Floor
It is made of plywood, cement board, fiberboard, wooden planks, and so forth. The floor covering is the surface material made of hardwood, laminate, tile, or carpet. It is also a thin layer of between 5mm and 15mm. The top part of the floor may be covered with fixed material, such as vinyl, plywood, ceramic tiles, carpet, or solid wood. It may also be covered with a floating floor that can theoretically be lifted without affecting the subfloor, for example laminate flooring and carpeting.
The floor is not a single layer of filling, but rather has three or four layers. As described by TheSpruce.com, a complete floor is made up of three or four layers, namely; the joists at the bottom, then the subfloor, followed by the optional underlayment, and finally the floor covering at the top. In a wooden floor, the joists are the wooden beams at the bottom of the floor that form the structural framework of the foundation. In a concrete floor, the hardcore and mortar are used in place of joists. The subfloor is the main foundation of the floor. It is made of thick planks of treated wood which can withstand the elements, rotting, and attacks from mites.
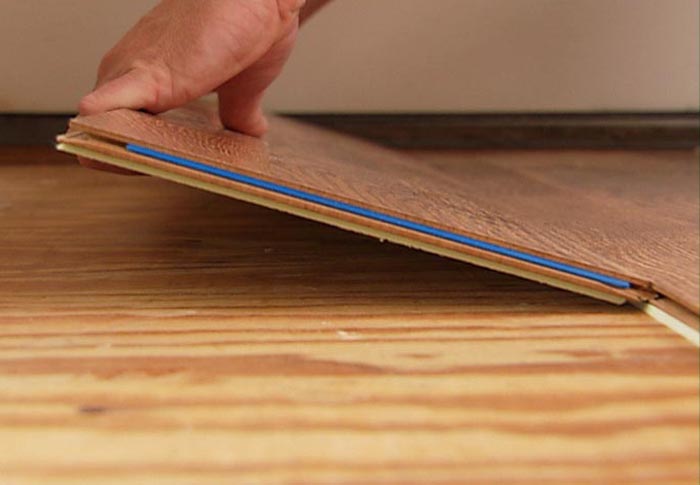
A concrete subfloor is also common. The surface of the subfloor is ideally made waterproof and level before underlayment. The underlayment is a thin layer of padding material (between ¼” and ½” thick) that provides a smooth and firm base for the floor covering. It keeps the floor covering in one place and creates an adhesive for cement boards. It also dampens the noise from footsteps and acts as a waterproofing barrier. It is made of plywood, cement board, fiberboard, wooden planks, and so forth. The floor covering is the surface material made of hardwood, laminate, tile, or carpet. It is also a thin layer of between 5mm and 15mm. it is noted that some floors have no underlayment, for example ceramic tile floors, while some have a combined subfloor and underlayment, for example concrete floors. Generally, you need to install underlayment when remodeling because the subfloor will have likely deteriorated. A new construction may however do without an underlayment, while an engineered wood or original hardwood may only require a layer of rosin paper (TheSpruce.com).
Flooring
The top part of the floor that defines the floor décor and appeal is the flooring or floor covering. It comprises of such materials as carpet, laminate, tile, and so forth. The type of flooring is determined by the use of the room. For example a wet area requires a moisture proofed material such as ceramic tile. A living room requires a comfortable and warm material such as carpet, engineered wood, solid wood, or laminate. The flooring may be attached to the subfloor or it may be a floating floor that can be moved or demolished without affect the subfloor.
Laminate Flooring as a Floating Floor
Floating floors are installed on top of the sub-floor, which is usually a concrete floor. As a floating floor it does not require nailing, binding, or interfering with the sub-floor. The laminate is placed on top of a sheet and foam underlayment. The joined planks of laminate form a single and heavy unit that stays in place and not slide around. The laminate itself is a thin photographic sheet of paper made to resemble any type of wood, and which is covered with a clear but hard resin that resists scratching. The laminate is joined together by either glue or a snap-in design that allows the planks to interlock.
As noted by NAFLA, the laminate floor has virtually no other parts like staples, nails, mortar or grout, and attachments to the sub-floor. It also requires minimal cleanup after installation, therefore it is fast to install – approximately one to two days per room. Planks of laminate are cut using a handsaw, cutting knife, or power saw. And since it is so easy to carry out, with few technicalities, measurements, and equipment, installation is basically a DIY project. You have to make sure the subfloor is level. Laminate can absorb moisture and therefore not recommended for wet areas like the kitchen and bathroom. It can still be installed below grade as long as a waterproofing sheet is laid underneath it and the room is dehumidified. Laminate can be installed in the guest bedroom and powder room which are either used infrequently or with minimal water spill, but the rooms should be checked periodically for moisture leak.
How Laminate Differs from Other Materials
According to thespruce.com, although many engineered flooring materials are created to give the natural wood look, they have a number of fundamental differences. Solid wood is of course natural wood while laminate is made from fiberboard and a fine composite or grains of wood that are mixed with a bonding compound and compressed firm. The composite is then lined with a photographic paper of wood or stone pattern, which is then coated with a transparent layer of plastic, which is scratch resistant, UV-protected, and moisture resistant. Vinyl is a lightweight, flexible, and completely waterproofed materials that is easy to install by a DIY. It is stain-resistant as well, but not resistant to fire. It costs about $4 to $6 per square foot.
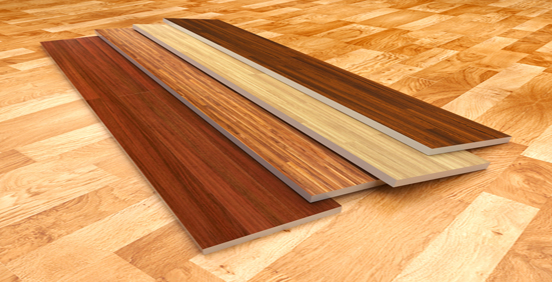
Engineered wood contains plywood underneath the hardwood veneer, while laminate has a fine wood grain which is covered in a resin. From a distance the laminate appears similar to natural wood, while engineered wood appears as natural wood because the veneer is natural wood. The engineered wood flooring costs in the range $5 to $12 depending on the quality and thickness of the board. Carpet is laid with a base material that protects it from floor moisture, mildew, and mold. The cost of laying a carpet varies greatly according to quality, and is in the range of $3 to $15 per square foot. Stone and ceramic tile flooring is an elegant choice even though it creates a hard and cold floor that does little to mute the noise from stepping shoes. The flooring is also quite expensive to install at $6 to $ 13 per square foot. Solid wood is the preferred choice of flooring, but unfortunately it is comparatively very expensive to buy, install by a professional, time consuming, and to maintain. It costs between $7 and $20 per square foot to buy hardwood, $300 to $700 to buy other related materials, and between $600 and $1800 to contract the installation.
Laminate flooring is the cheapest of the various flooring options, first because the materials cost between $0.60 and $3.00 to buy, $100 for other related materials, and because it is uncomplicated and fast to install, it is a free DIY project.
Natural Wood vs. Faux Wood Flooring
Flooring can be a concrete with waterproofing cement. Wood is a universally popular natural material for flooring, has a timeless look, welcoming, and feels warm despite its premium cost. Solid wood is made of completely natural material that is sawn, nailed to the subfloor, sanded over and over again, and polished to give it texture, and then stained, painted, waxed, or sealed. The installation is done by an expert. Apart from solid wood flooring, you can have engineered wood and laminate flooring. Engineered wood is a cheaper alternative to solid wood, and it uses processed wood and other materials for the base, and covered with a veneer of real wood as the top layer. It is sturdy, resistant to moisture, has less expansion and contraction, and it can be installed by nailing it to the subfloor if it thin, or as a floating floor if it is thick. It can only be sanded a limited number of times because the veneer is thin.
Laminate is a close emulation of wood even though it is made of different materials. It has manipulated properties such as moisture barrier, scratch proofing, elasticity, regular texturing, soundproofing, and so on that make it a good alternative to wood. It is easy and quick to install. It is however slippery, more unfriendly to walk on, and cannot be sanded or repaired. Both solid wood and engineered wood flooring are dented by pet claws, even when the claws are trimmed. If a pet dog has to be in the room then wood flooring may be inappropriate. You can instead choose vinyl, tile, stone, and even laminate flooring which is scratch resistant.
Engineered Wood vs. Laminate Flooring
Laminate flooring competes with engineered wood for popularity. Both a floating flooring, easy and fast to install by a DIY, and they are faux wood. Below is a comparison of the various attributes of the two types of flooring.
| ATRIBUTE | ENGINEERED WOOD | LAMINATE FLOORING |
|---|---|---|
| Description | A plywood with 5 to 10 layers and a thin veneer of hardwood | Pressed wood and compounds with a clear, hard-wearing top layer and wood pattern/texture |
| Raw Material | Plywood and thin hardwood veneer | A wood grain, melamine base, a paper print of wood patterns, and resin top. |
| Cost | $5.00 to $12.00 per square foot | $0.50 to $3.00 per square foot for a ¼” thick and ½” thick laminate respectively |
| Thickness | The board is about ¾” to 1” thick while the veneer is 1/8” to ¼” thick, | The entire laminate plank is between ¼” and ½” thick |
| Refinishing | Can refinish the veer by sanding it several times in its lifetime | Cannot be sanded and therefore cannot be refinished. Laminate flooring has to be replaced |
| Resale Value | Good ROI | Poor ROI because of cheap material |
| Moisture Resistance | Bonded with a moisture-resistant bonding compound | The top resin is waterproofed but moisture can leak through the seams |
| Installation Work | Involving as it needs gluing and stapling to sub-floor | Quick and DIY as it is a floating floor with interlocking boards instead of adhesive and staples. |
| Comfort | Fairly warm feel because it is wood | Fairly warm because it has soft base material that gives it bounce. |
| Areas of Use | Dry and slightly wet areas like the bedroom, living room, study, powder room, and so forth | Dry rooms like the bedroom, closet, living room, play room, and so forth |
| Best Attribute | The veneer made of real wood with natural patterns | Quick and cheap to install. It has a hard-wearing top surface |
| Worst attribute | Can only be repaired by sanding a few times. Moisture causes warping | Cannot be repaired. Entire floor has to be installed afresh. Unsuited to heavy, sharp objects |
Cost-Effective Flooring using Laminate Flooring
According to BuildDirect.com, a good laminate flooring should be affordable, look elegant, be resistant to abrasion, easy to clean by wiping, and be free of animal dander and hair. It should look similar to natural wood with a gleam. Among design choices are laminate flooring that are narrow in order to look realistically wooden, smooth surfaces that give the floor a sheen and a refined style, hand-scraped effect for an artistic touch, beveled and square edges for visual effect and better bonding, and textured surfaces for an authentic wood-appearance. Prices at BuildDirect.com start at a discounted rate of $0.59 per foot for an 8mm thick laminate flooring, therefore a standard 12’ by 15’ room wood cost less than $110 in laminate flooring and another $50 in underlayment. The glue-less locking technology enables a cheaper locking system, faster and easier installation, and less mess on the floor. The project is a DIY and therefore is quite affordable. Since it is floating floor, many states will not require a building permit.
The Pros and Cons of Laminate Flooring
Technology
Just like engineered wood, laminate flooring is not real, solid wood, but rather it is made of a mixture of materials. Modern laminate flooring is engineered with more durable material, fade-resistant colors, visual appeal, and realistic wood textures of such woods as oak, cherry, maple, mahogany, teak, oak, and birch. Pressing techniques enable deep embossing and texturing. The sizes of planks are now more varied from 3½” to 7½” width. Some manufacturers like Shaw or Armstrong have adopted EIR technology for their premium laminate flooring lines.
Installation
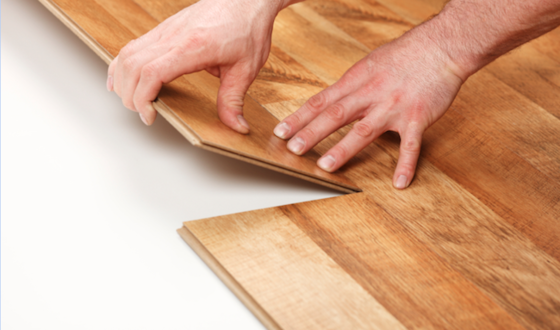
It is fairly easy and fast to install. You can cover a standard room in a day or two. It does not require nails, adhesives, staples or bonding compounds. The material is soft for cutting with a handsaw or utility knife. However, the click-and-lock type of bonding is not very reliable, are susceptible to warping when you force them to fit, the sub-floor temperature changes, or moisture and humidity increase.
Moisture
Laminate can resist moisture seepage because the top layer is a water-resistant compound. When the boards are tight together, they prevent moisture seepage. However, a persistent pool of water will slowly seep through the crack or seams and cause warping. The underside of the laminate flooring needs to be protected from upwelling moisture from ground below. This is achieved by installing a waterproof, plastic sheet costing less than $20 over the subfloor and below the underlayment.
Cleaning
Water can still seep through the seams or cracks and cause the laminate flooring to bloat and warp, therefore a bucket of water and a wet mops are totally not recommended. Laminate flooring is however easy to clean with a broom, vacuum, or damp and wringed mop, and does not require floor waxing or preservative treatment. You can use a special laminate cleaner that cleans and seals seams or cracks. The laminate flooring cleaner costs about $8. A well-laid laminate floor is water tight at the seams, thus free from moisture leaks. Stains can be cleaned off by wiping, sometimes with a dab of vinegar.
Durability and Maintenance
Laminate is a durable flooring material despite its appearance of a weak material. It may not match the beauty and longevity of natural wood, but unlike wood, it does not easily warp, and it is almost maintenance-free. Ceramic tile and stone flooring can easily crack and is cumbersome to install, while engineered wood has a thin veneer that wears down the underlying plywood more easily than a laminate wear layer. The laminate flooring’s top layer is a resilient wear layer, while the inner layer is made of a strong, high density fiberboard base which gives it strength and at the same time bounce or soft landing.
Laminate flooring does not dent or scratch easily because of the hard-wearing top layer of resin, which is also stain-resistant. On the downside, it cannot be sanded and covered again to give a new lease of life. Sanding would destroy its protective resin layer. Instead of repairs, you are compelled to redo the entire flooring.
Appearance
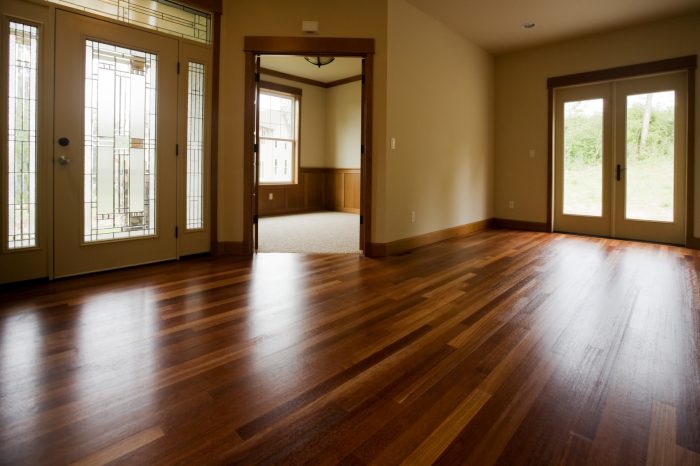
Laminate is appealing to look at because it has a natural wood appearance, less the “imperfections” that are common with natural wood flooring. In a close-up view, one notices the faux appearance. If by coincidence two similar boards laid side by side end up with the same pattern position they would not look natural or as appealing as they should be when done correctly.
Functionality
Because of the underlayment, the floor has a springy feel, which encourages one to stand on the floor for longer periods. It is however quite slippery when moist, thus making it unfriendly to persons with disability. It also builds up static electricity, especially when it is dusty, which can affect electronic gadgets. The underlayment to cover a standard sized floor costs about $80 and it is easy and fast to install.
Resale Value
The negative perception of laminate flooring is that it is an inferior material, but manufacturers have been working towards a better quality product. Laminate flooring is very cheap compared to other flooring materials, and therefore the house resale value is low. Hardwood and engineered wood give a better ROI. The ROI can be improved by the use of modern and hard-wearing laminate flooring, for example, textures and embossed laminate flooring.
The Process of Installing the Laminate Flooring
There are several ways of installing a laminate flooring. In a remodel, the floor will have had a different type of flooring such as carpet or an aged laminate flooring, which have to be removed first. If the installation is for a new construction then you need prepare the floor in advance for laminate installation. You will most likely create a subfloor that is level and moisture proofed so as to remove the need for an underlayment. The methods of binding the planks of laminate flooring include click and lock of the tongues and grooves, and gluing the edges. According to DIYNetwork.com, a laminate floor can be installed in a couple of days.
A DIY will need to be armed with a pull bar or a pry bar, speed square, tape measure, wooden or rubber mallet, baseboard, shoe mold, caulk, paint, laminate flooring material, and an underlayment. Installing a laminate floor in a standard room measuring 15’ by 20’ takes just a day or two although you have to allow another two or three days’ break for acclimation. It typically costs less than $300 to install the laminate floor as a DIY project. The laminate is economical, good-looking, and easy to install, unlike other types of flooring. It can be installed anywhere in the house except the wet areas, which are avoided because of the possibility of the laminate flooring bloating and warping because of moisture.
Quick Overview
Laminate flooring is a quick process that should not take more than two days, excluding acclimation, to accomplish. The following are the chronological activities in laminate flooring installation that involves replacement of the carpeting.
| ACTIVITY | DURATION | TOOLS |
|---|---|---|
| Remove carpet and padding | 1-2 hours | Utility knife, putty knife |
| Remove baseboards and shoe mold | 1 hour | Utility knife, putty knife, pry bar |
| Clean and level the floor | 1-2 hours | Putty knife, brush, vacuum cleaner |
| Acclimate | 2-4 days | None |
| Measurement of the floor layout | ? hour | Measuring tape, pencil, speed square |
| Prepare the door frame | ? hour | Utility knife |
| Install moisture barrier and underlayment | 1 hour | Duct tape, utility knife |
| Install the flooring planks | 3-5 hours | Laminate flooring, measuring tape, speed square, rubber mallet, pull bar, spacers |
| Install baseboards and shoe mold | 1-2 hours | Baseboards, shoe mold, caulk, chisel, hammer |
Tools and Materials for Laminate Installation
For this project with a standard 15’ by 20’ room, you need to assemble the following materials.
| MATERIAL | COST |
|---|---|
| The laminate flooring | $150 |
| Foam underlayment | $70 |
| Shoe molding | $30 |
| Threshold strip | $5 |
| Brad nails | $5 |
| Caulk | $10 |
| Duct tape | $5 |
Selecting the Laminate Flooring
There are different choices of flooring such as engineered wood, cork, vinyl, bamboo, carpet, hardwood, and laminate. Assuming you select laminate flooring, you have to select the most appropriate laminate for your room before you start the installation. You will choose the design and pattern you want for the laminate flooring. This includes the color, pattern, and texture of the laminate, thickness of the flooring, mode of interlocking of the planks, and the type of underlayment. A thick floor, which is between 10mm and 13mm thick is more durable and will generally have a longer warranty than a thinner laminate flooring of 8mm. The preferred locking systems are the tongue and groove, V-shaped bevel, and square-shaped bevel. Modern techniques have a glue-less locking system, which saves money, installation time, and gives a seamless joint. A waterproof floor underlayment is desirable because it not only protects the laminate flooring from the subfloor scouring action, but it also creates a waterproof barrier against upwelling moisture.
Uninstalling the Carpet
There comes a time to say out with the old carpet and in with the new laminate flooring. You will be armed with a utility knife, putty knife, pry bar, sweeping brush, cleaning solvents, and a 6-foot level. In many cases, people switch from a different type of flooring to laminate flooring. In the case of carpet – which is a traditional flooring type, the old carpet is firmly adhered to the subfloor, and has to be removed before installing the laminate flooring.
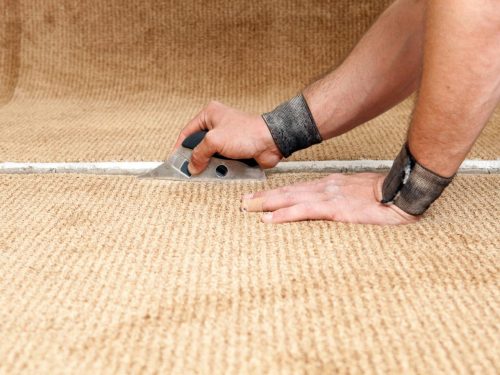
Removal requires that you first remove the shoe molding using a utility knife to cut through the caulk, then pry lose the shoe mold. You then have to cut the carpet lose across the doorway using a sharp utility knife. Pry out the carpet perimeter tack strips from the padding by pulling up the carpet gently, and roll up the rest of the carpet. Since the tacks are not reusable and they are sharp and can cause a pricking accident, be sure to remove them one by one from the carpet and padding and dispose of them safely.
The carpet may be reusable in another room or at a recycling collection center. For the padding, you might have to use a putty knife to scrape the gluing off and release the padding. Next, you will decide whether to move and replace the baseboards or just remove the shoe mold and install a new one after laminate flooring. It is not necessary to remove the baseboards unless you have a baseboard installation project as well. If you remove the baseboards, you need to scour the caulk from the joint between the trim and the wall using a utility knife, and then pull the baseboard off the wall using a putt knife to loosen it. This will protect the drywall and wall paint or wallpaper from damage. If the baseboard is nailed to the wall then you can free it using a pry bar. Lift one side of the carpet and roll it in a like a cylinder manner so that you may conveniently carry it out of the room.
Cleaning and Leveling the Subfloor
A floating floor is not attached to the floor therefore it has to be level. Clean the sub floor thoroughly by removing any sticky glue and tack pins with a putty knife. Sweep with a hard brush and vacuuming the dirt. You will then use a 6’ level to measure any variations in the floor gradient, which should not exceed ¼” over a 10’ distance or 0.2 percent gradient. A slanting floor will squeak when walking on it, feel spongy, and over time it will slowly slide towards one side of the room, thus damaging the laminate flooring. In the extreme, one can skid and fall on the floor when it is wet with soapy water. To correct the slant use a sander to level off the bumps or high points on a hardwood floor or a leveling compound to level a concrete floor.
Acclimating
Acclimating allows the flooring to adjust to the room conditions. This is achieved by leaving the laminate in the room for a couple of days or so after laying the moisture barrier and underlayment. The materials and the subfloor will then have a uniform condition.
Measuring the Floor Layout
Confirm the width and length of the room, noting that the planks are best laid out facing the doorway as this makes the room to appear larger and is less prone to lateral forces on the laminate. To know how many planks you need, you need to calculate the floor area in feet squared, width x length, and divide it by the area of one plank in feet squared, and allow 10 percent extra material for wastage and damage.
Preparing the Door Frame
You need to clean cut off a bit of the underside of the door, equivalent to the thickness of the laminate flooring, in order to create a swing area over the laminate flooring. Calculate the total thickness of the underlayment and laminate flooring, then measure that clearance from the floor up the door using a speed square or tape measure. Mark the height at three points, that is, at the center and the ends of the door width. You can do the cutting using a vibrating saw or if you have the technique you can use a trim saw. If the door has removable hinges then you can unhinge, do the cutting, and reinstall the door.
Installing the Underlayment
According to TheSpruce.com, a laminate underlayment is important for cushioning and smoothing out minor bumps in the subfloor, since laminate flooring is a thin board. The underlayment should be as thin as possible because a thick underlayment will reduce the room height significantly, and will allow too much floating and buoyance of the flooring. Instead of using the underlayment to create structural stability, you should do that with the subfloor. In any case a problematic subfloor will transfer the problems to the underlayment and eventually to the flooring above. There are several types of underlayment to choose from. The long and narrow rolls are about 3mm thick, 44’ wide and 27’4” long. Light foam is lighter at 1.5lbs per 100 square feet and less durable. It cost about $15 per roll. Heavier foam weighs about 2.2lbs per 100 square feet and is sturdier. It cost about $30 per roll. Felt underlayment is also available. It has a cloth-like texture and feel and is more effective at smoothing roughness than foam underlayment. It is also much denser and cost about $40 per roll.
Purpose of underlayment
The main purpose of underlayment is to smoothen the floor and make a flat surface. Unlike other flooring types, laminate is very thin and requires a more solid underlayment to cushion and support it. The underlayment also provides sound absorption, which is especially important when you have rooms below the floor or in an open floor plan such as the living room-kitchen footprint. The underlayment improves the floor’s thermo-insulation because it is made of a foam with air pockets in it. It also creates a barrier against upwelling moisture. This is achieved by laying a heavy-duty plastic sheeting over the subfloor before installing the underlayment.
The underlayment covers up any gaps in the subfloor, giving a smoother surface. Underlayment is not a substitute moisture barrier, therefore you should still install a vapor-barrier over the concrete subfloor. Since it is very thin, an underlayment is not a substitute thermo-insulation. You still need an HVAC, room heater, or electric heating mats on the laminate floor, especially in the basement area, to maintain an ambient floor temperature.
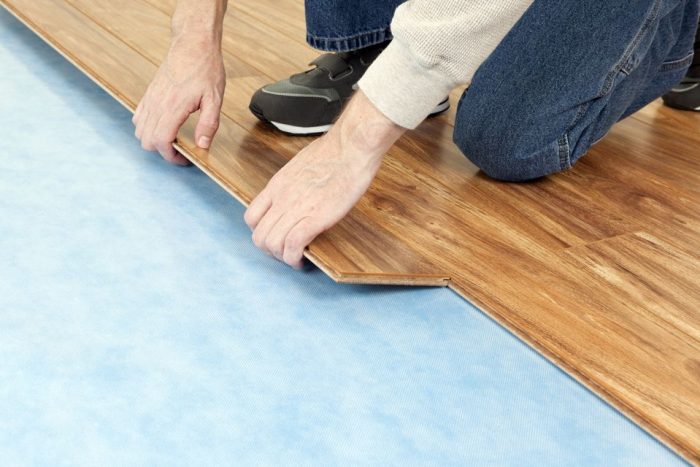
The cost of underlayment is low, at $0.25 per square foot. Some laminate flooring, such as DuPont Real Touch and Pergo Accolade come with pre-attached underlayment, and cost about $1.00 to $1.30, which is a cheaper on labor and installation processes. Pre-attached flooring should never have another underlayment below it as this will cause the floor to feel squishy and be less durable.
Types of Underlayment
A grade A/C Plywood board underlayment is a common and affordable choice. An alternative to plywood is the OSB or orient-strand board. Its rougher side faces the subfloor. Foam and cork underlayment is popular because it is spongy, soft and durable. It absorbs sound and is a good insulator. Since it is elastic, it is laid right up to the edge where the floor meets the wall. Underlayment panel underlayment is a more expensive option comprising of 2’ by 2’ square, tile-like panels that interlock to form a strong underlayment and a moisture barrier. It is also fast to install. The cement board underlayment, such as Durock and Wonderboard are made of cement and fiberglass and are suitable for melamine, stone and ceramic tile finishing. They are strong, mold- and mildew resistant, and durable, but they are also expensive. Of all the types of underlayment, the A/C grade plywood is cumbersome to transport and cut to size, foam and cork are easy to just roll out, cement boards are floating on the subfloor, and underlayment panels are fast to lay as they are also floating and self-fitting when they are interlocked.
Generally, foam and cork underlayment do not add basic underlayment functionality and may be considered as a cosmetic addition to the floor. As a rule of the thumb, underlayment should be as thin as possible so as not to reduce the floor to ceiling height of the room. The underlayment is not meant to add stability to the subfloor, but rather, to smoothen the surface for the floor covering. Underlayment is normally sold in rolls which are 4’8” wide and 27’3” long. Use an underlayment that is at least as long as your room size in order to avoid unnecessary seams. Where they are unavoidable, such as connecting two strips of underlayment, you use a self-adhesive on the underside or by taping them together. You therefore have to cut them according to your needs.
Light, polyethylene foam, which is only 3” thick and 1.5lbs per 100 square feet is the cheapest type of underlayment in the market, costing about $40 per 200 square feet. Heavy foam is denser at over 2lbs per 100 square feet, has a better sound barrier, and is more expensive than the light foam. It costs about $80 per 200 square feet. Felt underlayment is a thinner but stronger material than foam. It is made of recycled fibers that feel like rough cloth and has a density of 12.5lbs per 100 square feet, which makes it a good sound barrier. It costs about $110 per 200 square feet.
Unroll the underlayment
The underlayment has a strip tape on one side that is taped along the wall to be covered and an adhesive tape on the other end. The clear plastic top side of the underlayment faces up as you unroll it. The underlayment and the subfloor planks should run in the same direction. Run the first underlayment sheet along the longest floor length and work towards the doorway. Let the underlayment run 4” up the wall as well. In the second row of underlayment sheet, let the plastic edge overlap the first sheet. Peel back the adhesive tape on the first sheet and let it join to the second sheet. Smooth the edges and continue to lay the third and subsequent sheets in a similar fashion. Use a sharp utility knife to trim off underlayment at corners and where they obstruct utilities like the HVAC vent.
Laying the Laminate Flooring Planks
Laminate floors expand and shrink due to heat and humidity and therefore you should create a small space between the flooring and the walls. Spacers ensure the laminate flooring planks are not too long and touch the wall. You need to tape the spacers to the wall all around the perimeter of the floor. You need to create a space of about ½” or so all around the laminate flooring from the wall, and you can use a piece laminate flooring as the spacer. The laminate flooring is a floating floor, that is, it is not pinned to the floor. You create a long board from wall to wall by joining two or more planks together, and you join the long boards to each other to cover the entire floor. Each laminate board has a tongue and groove. The tongue snaps into the groove of the next board and makes a strong bond. The tongue has to be trimmed at corners to allow for a smoother corner. The planks of each row need to be staggered so as to create the impression of continuity, make a firm locking, and utilize the cut off planks.
When laying the first row start at the wall directly opposite the doorway. The first plank on the row should ideally be 12’ long or so, while the shorter plank should be at least 3’ long. Although it is soft enough to cut easily, you should protect the face of the board. Cut smoothly and patiently, starting with the top face and down to the base. To trim the shorter plank you need to flip it over, push it lengthwise up to the end point. Use a speed square and pencil to measure and mark the cut line. To make a clean, straight and accurate angle cut, use a circular saw or jigsaw. If the cut off piece is at least 2’ then it can be used for the next row. When bevels are cut at an angle or are flushed do not make a good alignment or elegant finish. For the next row, you need to snap the tongue and groove parts together, gently rocking and tapping the whole assembly together. Pull the planks away from the wall using a pull bar and soft mallet. Use alternating long and short planks on each row so as to create the impression of a continuous and solid flooring.
Installing the baseboard
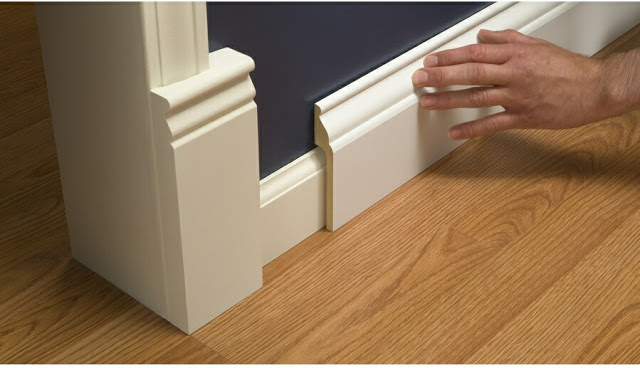
When installing a new baseboard you will use a stud finder to locate all the studs around the perimeter of the room. Line up all the baseboards at the room’s corners and fasten them using 2” nails. Leave a ¼” gap between the baseboard and the floor. Do all the corner baseboards first, then the rest of the baseboards. If need be, measure and cut narrow baseboards to complete the coverage. However, baseboard installation is a different project, and is only mentioned here because laminate installation may affect the baseboards. A 4’ by 8’ baseboard cost around $35 a piece.
Installing the Shoe Mold
Remove the spacers in order to do the installation of the shoe mold. Cover the spaces along the perimeter of the floor with shoe molding. Make sure the stubby side of the shoe molding is on the down side. Fix the shoe molding with 1½” brad nails at 16” intervals. Finally, caulk and paint the shoe molding. The shoe mold around the room, a 1-liter can of paint, and the brad nails will cost less than $50 to buy.
Installing the Threshold
At the door where the flooring ends, you need to put up a threshold that will protect the flooring from being worn off at the edges and people from tripping as they walk into the room. The threshold will cost about $10 or $15.
Caring for the Laminate Flooring
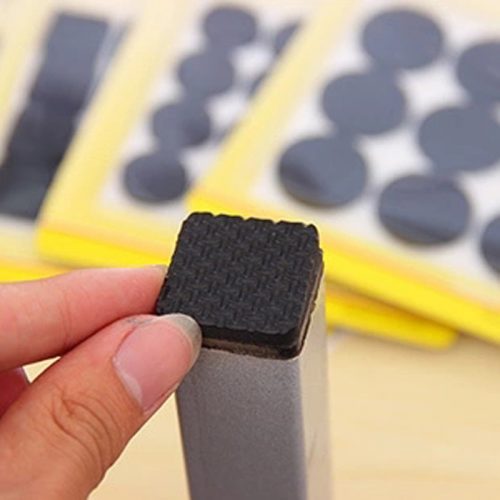
You need special care of the laminate floor to maintain its condition, shine, and cleanliness. However it is surprisingly cheap to care for the floor. Wet spills can be wiped quickly with a mop. Do not allow a waxy buildup, therefore do not use a shine or floor wax on laminate flooring. Pine-scented cleaners have a soapy residue that makes the floor dangerously slippery. Murphy’s Oil leaves a murky streak on the laminate. Small doses of vinegar, which is acidic, are not bad for clearing stains or spots, but a generous application will react with the wear layer and cause it to lose its transparency and shine. Sharp objects like high heel shoes and dog claws can puncture the laminate flooring. Place soft pads under the furniture legs, trim the animals’ claws, and place a dog mat where the animal likes to stay and sleep. These measures cost a negligible sum of money.
Simple maintenance involves sweeping the floor often with a soft-bristled brush. Use a dampened mop to clean off dust. It should be dampened with hot water and a pinch of dish-washing liquid. A little window cleaner can clean off common stains but the compound contains ammonia which strips it of the laminate’s top shine. The cost of laminate cleaning detergent costs less than $10.
Cheat Sheet for Laminate Flooring
Below grade: A structure or located below the ground or surface level, for example the basement rooms are below grade.
Caulking: A chemical compound that is applied between gaps or seams to form a seal or bond two materials, especially between a wall or floor and a shoe mold.
EIR: Embossing In Register or EIR imprints along the laminate’s photographic layer and not at random places.
Floating floor: This is a floor covering that is not fixed to the subfloor with nails, staples, or adhesive compound.
Flooring layers: The different layers of a floor, from the structural foundation to the floor finishing. It also refers to the different layers that make up the flooring material, for example a laminate flooring has a base, photographic paper, and a hard-wear top.
Laminate: A material that is made of layers of different materials.
NALFA: The North American Laminate Flooring Association or NALFA is a lobby group that encourages home owners to use laminate flooring.
Plywood: This is a 4’ by 8’ sheet of engineered wood that is bonded and pressed together with a waterproof adhesive in layers (plies) to form a sturdier, more stable against warping and continuous board. One side is rough and the top side is smoother and can be sanded.
ROI: Return on investment or ROI is the increased value of the house brought about by a development or remodeling.
Shoe molding: A 2” to 4” wide plank that is installed to cover the edges of the floor finishing and give it an elegant appearance.
Subfloor: The permanent floor surface made of concrete, stone, brick, hardwood, or other appropriate material, onto which a movable or floating floor is installed.
Tongue and groove: The groove is a narrow trough cut along one side of the plank and which fits over the tongue of another plank. The tongue is a narrow ridge along the side of plank which locks into the groove of another plank.
Underlayment: The part of the floor above the subfloor and on which a floating floor is installed. It acts as a cushion for the flooring and as a moisture barrier.
Source:
thespruce.com
