- No Obligations
- Stop Paying Too Much For Your Contractor
- No Spam Calling
- Screened & ID Checked Contractors only!
How to Plant Potatoes: Practical Tips & Tutorial
3
 How to Plant Potatoes: Practical Tips & Tutorial
earlyexperts.net
How to Plant Potatoes: Practical Tips & Tutorial
earlyexperts.net
“What I say is that, if a man really likes potatoes, he must be a pretty decent sort of fellow.” ― A.A. Milne
We have to thank the Spanish Conquistadors for making the humble potato the fourth largest food crop in the world. When they ventured to Peru in 1536, they discovered the local Inca tribes cultivating the vegetable and had some shipped back to Europe. The rest is history.
The potato has become a staple in the diet of most people around the world. One of the reasons for it becoming so popular is the simplicity of its cultivation. So simple, in fact, that millions of amateur gardeners plant every year so they can have their own crop of fresh organic potatoes. There are seven accepted methods for the amateur gardener to plant potatoes. They can suit big gardens, small gardens, and even those people with no garden at all.
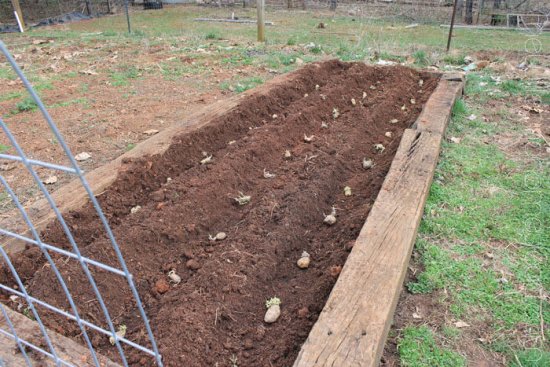
Hilled Rows
This is the cheapest way to grow potatoes and is the method used by farmers to produce potatoes commercially. It is best if you have a larger plot. Once the soil has been prepared, shallow trenches need to be dug a couple of feet apart. This way you have hilled rows of soil.
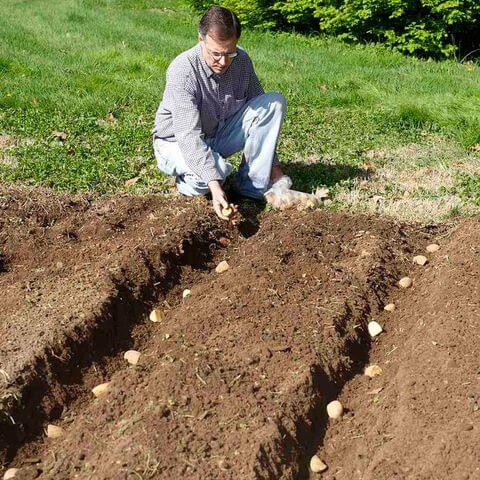
Seed potatoes can then be planted about three inches below the surface, and twelve inches apart, and then watered. The potatoes will send out shoots, and once they are about 12 inches tall, soil from between the rows can be used to bank up the mounds to cover about half of the shoot.
As the potatoes continue growing the banking of the soil can be repeated. The potato tubers need to be completely covered, and the ground regularly watered. This works well in rich soil; if it is clay or low in nutrients, other methods are more productive.
Straw Mulch
Not everyone has the strength to dig soil to create the banks in the hilled row method. In that case, straw mulch can be the answer. The seed potatoes are placed on the surface of the prepared soil about twelve inches apart. Seed potatoes need to be covered with about four inches of straw that is free of seeds. As the potatoes begin to sprout and grow stems, more straw can be added. Before harvesting the straw bed can be more than 12 inches thick.
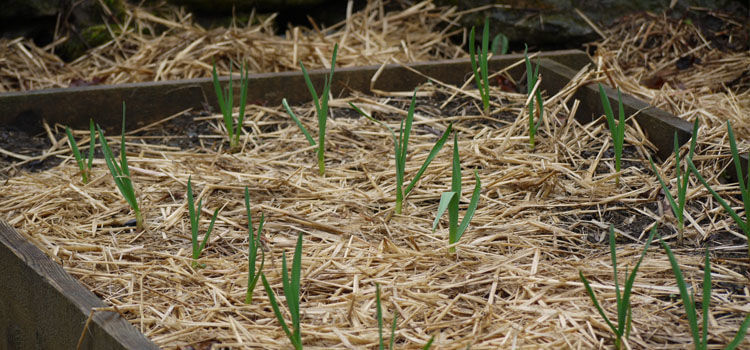
This straw mulch contains the moisture in and smothers weeds. It will also deter the Colorado beetle potato pest. The yield will not be as great as the hilled row method, and field mice can banquet on the potatoes under the straw cover if you are not careful.
Raised Beds
Raised beds are areas of the growing plot that have containers with sides at least twelve inches tall. They are a good choice if the soil in the garden is poorly drained and heavy. These should be half-filled with soil that has been well prepared. The seed potatoes can be planted in a similar way as before, about twelve inches apart, and three inches deep.
As with the hilled method, more soil should be added as the stems of the potato plants grow. This soil has to come from somewhere and is the biggest drawback of this method. It takes a lot to fill a raised bed. To harvest, all you need to do is remove the sides of the container. The main advantage of using this method is you get an excellent uniform crop.
Wooden Boxes
Lots of garden centers sell bottomless square boxes for creating raised planters. However you can make your own quite easily. The wood from discarded pallets is ideal. You will need four corner posts and the planking from pallets.
The planking can be nailed or screwed to the corner posts, and then filled with soil as in the previous method. If you need to provide more support for the soil being added, further slats can be attached to the posts. To harvest, the bottom slat can be removed, or the light structure can be just dismantled.
Wire Cylinders
Not everyone has perfect growing conditions. If your ground is wet and has a high moisture content, or you live in an area with high spring rainfall, then potatoes can easily rot in the soil before they are ready to harvest. You should be able to purchase ¼-inch mesh hardware cloth from a garden center or home improvement store. The mesh should be about 24 inches wide and needs to be fashioned into a cylinder 18 inches in diameter. Stand the cylinder upright and put a few inches of soil in the bottom. Plant three of four seed potatoes under three inches of soil, and then add soil as described earlier. The wire mesh prevents the soil getting waterlogged by providing excellent drainage.
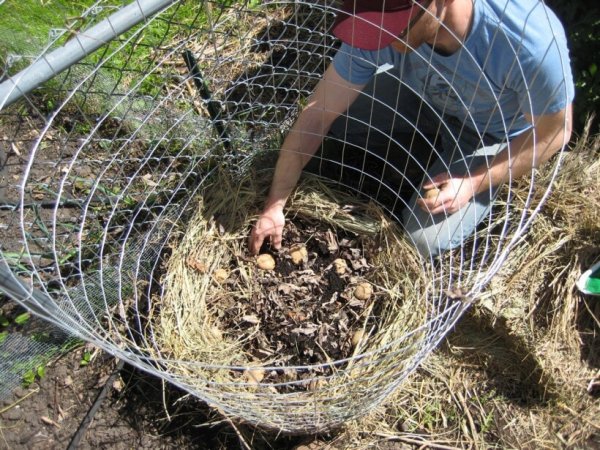
However, as the soil is above the ground level, and is open to the atmosphere, it can also dry out very quickly, so making sure there is enough moisture for the potatoes to mature is important. To harvest, just lift the wire mesh cylinder.
Grow Bags
If you don’t have a backyard or garden to grow things, and maybe only have a balcony, patio or driveway, then how about using a grow bag. These heavy polypropylene bags can come empty for you to fill with your own soil-compost mixture, or ready filled. As before, you can plant three or four pieces of seed potato in each grow bag about 3 inches below the surface. As the stems of the potato plant grow, more soil can be added. Because grow bags are made of black plastic they capture any heat from the sun to promote early growth. Harvesting a bag simply means dumping out the contents, and the grow bag can be reused for another crop.
Garbage Bags
In some ways, this is just ‘grow bag lite’, as the method is exactly the same as with a heavy duty grow bag. A few holes need to be punched in the side of the bag to allow for drainage. As these are lightweight putting there is a tendency to put too much soil in them, so they become heavy and tear when moved. However, harvesting is simple, just tear the bag apart and throw it away. Some people have been disappointed with this method as the thinner plastic appears to allow the soil to heat up more than a grow bag. This, in turn, limits the formation of the potato tubers and gives a poorer crop.
General Rules on Planting
To get the best crop of potatoes in an area with a cool climate, you need well-drained loose soil. Folklore suggests planting anytime from mid-March to mid-April. Depending upon where you are in the world, it is recommended that potatoes should be planted anytime in the two weeks after the last spring frost. The best potatoes to plant are seed potatoes, not grocery produce. The seed potatoes will have eyes or buds and should be cut into pieces the size of golf balls, which include at least one eye.
The seed potatoes should be cut a day before planting to allow it to ‘heal’ and form a protective layer on the surface of the cut. They should be planted with the cut face down about three inches under the surface. About two weeks after planting you should see the first sprouts appear, and then you can begin the process of banking soil over the potato plants.
General Rules on Cultivation
✓ Always make sure the potato tubers are covered with soil. Allowing sunlight to reach them will make the potatoes turn green.
✓ The plants are at their tallest in the morning, so this is the time to add soil. During the day the heat will cause the potato plant to droop.
✓ Try and maintain a constant moisture level during the growing season. Potatoes need no more than the equivalent of two inches of rain a week. Too much or too little water can reduce yield and produce misshapen tubers.
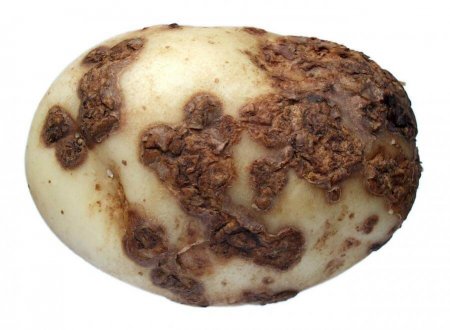
Pests & Diseases
Potatoes thrive in acid soil, so anything higher than a pH of 5.2 can cause problems such as Potato Scab. To reduce the risk of scab dust the seed potatoes with sulfur before planting.
The Colorado beetle is another enemy of the potato grower. It can be picked off the plant in the nymph state, or controlled with organic pesticides.
Other pests to look out for are Aphids, Flea Beetles, and Blight.
Harvesting and Storing
Potatoes should be harvested on a dry day. The crop should be dug up gently to avoid cutting or bruising the skin. If the soil is wet, then allow the potatoes to air-dry before storing in a bag or basket.
✓ New Potatoes:
Early harvest potatoes are referred to as new potatoes, and are smaller and have tender soft skin. They are usually harvested a couple of weeks after the plant has stopped flowering. New potatoes are best eaten with a few days of harvesting.
✓ Regular Potatoes:
For the best crop of potatoes wait until the plant has died back completely. Browning foliage needs to be cut back to the ground, and the tubers should be allowed to stay in the ground for up to 14 days. At that time, the potatoes develop a thicker skin. Once harvested allow the potatoes to sit in a dark, dry, cool place for up to two weeks to allow the skins to cure. This helps the potatoes last longer. Never store them in a refrigerator.
Most Read


How to Get Rid of Mice in Walls and Ceilings
Aug 15, 2018
The Right Time to Fertilize Your Lawn
Apr 06, 2021

Our Favorite DIY Bathroom Upgrades
Apr 06, 2021