- No Obligations
- Stop Paying Too Much For Your Contractor
- No Spam Calling
- Screened & ID Checked Contractors only!
Leaking Roof? Quick Fixes You Can Do Yourself!
0
 Leaking Roof? Quick Fixes You Can Do Yourself!
earlyexperts.net
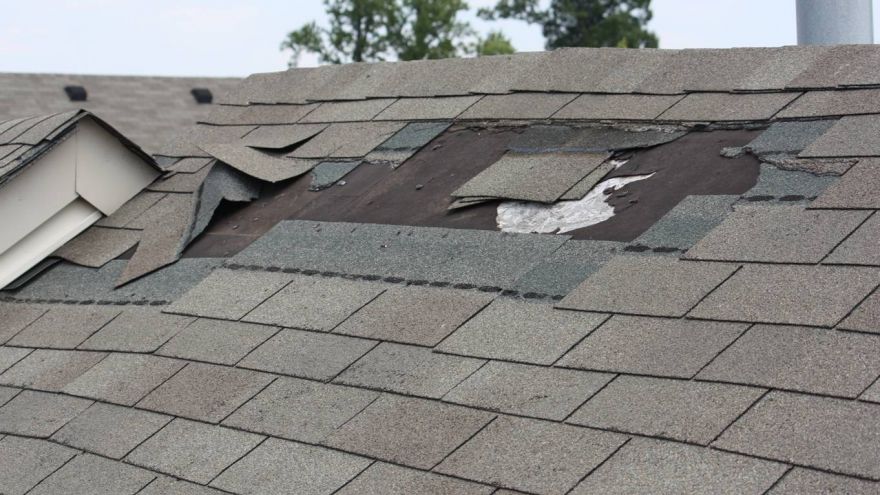
That odd discoloration where the living room ceiling meets the wall can certainly be covered up with a fresh coat of paint, but that is the definition of a temporary fix. Almost always, staining across ceilings that extend down walls are clear signs of water damage. The source of which, more often than not, is a leaky roof.
Even if the visual signs of the leak do not bother you much, and you are cool with intermittent paint touch-ups as a solution, it is important that you understand the other side effects of moisture to your home’s structural integrity.
Water in the attic or that sits upon insulation and ceiling joists can be detrimental. Any type of leakcand end up in a bigger issue. In a very short amount of time, you may find yourself dealing with mold, damaged insulation, and in the worst case scenario, a ceiling cave in.
With that said, each sign of a roof leak does not necessarily mean thousands of dollars for roof repairs. Much of what is causing the early signs of water damage can be taken care of fairly easily and at little cost. In this article, we outline how to locate leaks, and a few ways in which you can batten down the hatches before the job becomes too much for you to handle.
How to Find a Roof Leak
The best place to start when it comes to identifying the source of a roof leak is with existing penetrations. A penetration is anything going through shingles like a chimney, roof vent, or dormer. There can also be unintended penetrations like when a branch falls on your roof in a storm and leaves a small crack or fault line upon the roof that initially goes unnoticed.
Using these penetrations as a guide, you can follow stains, marks, and mold to a leak’s source from your attic. If you do not have attic access then you will need to climb up onto the roof itself. If this is the case, you may need to employ some tricks of the trade.

Have a helper stay in the house at the site of the water damage or dripping. Meanwhile, head up and let the water run downhill towards the relative spot of the leak nearest to penetrations.
For example, if the water damage seems to be placed in the corner of the sitting room and the closest penetration is the chimney, let the water run on either side of the chimney. When you helper sees the drip you can focus the radius of the spray and eventually pinpoint the leak site with a little more accuracy.
Next, you can begin removing shingles to get a better look at what is happening underneath. Since you have isolated the location a little bit more, you shouldn’t have to take up too many shingles before you find what you are looking for.
Small Leaks
While easy to fix, small leaks are often most difficult to find. You will have a general sense of where the water is coming from having gone through the location process on the roof, but where it is getting in could be another issue entirely.
Some ceilings have a barrier between the attic insulation and the drywall. It may be that this plastic barrier is catching water and redirecting to another location in the ceiling where it is finding its way onto the ceiling drywall like through a light fixture.
To find out if this is the case for your house, head up into the attic to the spot where you believe the water is landing initially. Move the insulation aside and look for flow stains on the plastic.
If you do not find any flow marks, examine the underside of the rood in the attic for nails that missed a framing board. These nails are often known as shiners because the shine of the metal is exposed as it is not fastened to anything.
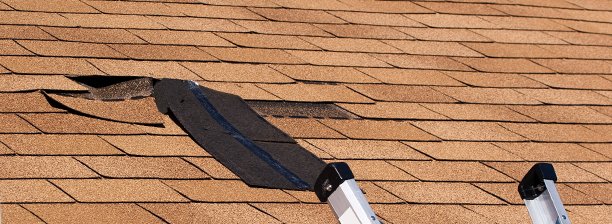
A shiner is another example of a penetration. Because it is metal, the water that leaked through dousing the nail may have frozen in the winter months. As the temperature outside increased, the ice on the nail may have thawed and begun to leak.
To solve this problem, simply clip the nail flush to the roof rafter. This will substantially reduce dripping in that area. What little water comes through around the nail head will most likely be absorbed in the insulation at such a slow rate, it will not present any real threat.
Plumbing Vent Boots
Vent boots are the implement that seals the area of roof surrounding the base of a PVC vent. Boots are covered by a flush base that is either plastic or metal. If yours is plastic, look for cracks in the base. If metal, the culprit will most likely be a broken seam or weld.
If there is no damage to the base, remove it and examine that rubber boot where the pipe meets the roof line. In some cases, these are torn or rotted, and thus, allow water down along the pipe. In this case, simply buy a replacement boot at your local hardware store.
Roof Vents
Just like plumbing vent boot bases, roof vents are housed in plastic or metal boxes. These can be cracked or broken at the seams as well, giving water a clear path down a vent into the attic.
Vents are placed in attics to allow for the hot air that accumulates in the space to seep out. This keeps attics relatively dry and protects from humidity that causes rotting. That said, it is literally designed as a portal between the attic and the outdoors.

With this in mind, caulking or sealing the vent house will not be enough. It may protect in the short term, but it is just as easy, if not easier, to replace the vent house completely.
Walls and Dormers
Sometimes, wind-driven rain comes in around windows, where boards meet siding on second levels or dormers, or through cracks in the siding itself. The caulk that lines the area where a dormer or window meets the roof can be old and compromised. This is easily fixed by simply recaulking.
Even if the caulk looks good, it is better safe than sorry, especially if you have located the caulked area in the relative position of the leak. Dig out the existing caulk with a utility knife and squeeze a fresh bead.
Also, check on the first layer of siding above the step flashing. Because of the water that can accumulate in this corner, the siding here can be rotted and damaged. When replacing the siding or shakes, make sure the new pieces overlap the flashing by at least two inches to create a proper seal.
There is also a chance that the flashing itself is not doing its job. Flashing is the sheet metal like material that runs along the edge where the roof meets and a second level or dormer. The flashing is meant to catch water and send it downhill along the roof angle, but if the flashing is bad, the water will sit at that corner and most certainly find its way down alongside the siding and into the house.
To replace flashing, you will need to remove shingles and the flashing beneath. When installing the new flashing, make sure it is held in place and securely fastened. Because the flashing is so thin, you run the risk of losing a piece as it falls into the house along the wall if you are not careful.
Conclusion
The first signs of water damage are not to be taken lightly. Of course, the initial concern is that it ruins the aesthetic of the home, creating discoloration along your ceilings or walls, but a paint touch up should never be the final solution.
Still, this doesn’t mean you have to spend thousands of roofing repairs. More often than not, discoloration from water damage is the accumulation of moisture over a long period of time through a relatively small leak.
Follow the steps outlined above to locate the source of a leak by looking first along penetrations through your roof. Do not fret if the source doesn’t match the site of the leak in the house. There are so many factors beneath the surface of the roof that can be the cause of this. Simply take care of the point of entry to put an end to mold, discoloration, and the potential to any larger, future disaster.


