- No Obligations
- Stop Paying Too Much For Your Contractor
- No Spam Calling
- Screened & ID Checked Contractors only!
Sealing Grout: Tips and Products to Use
0
 Sealing Grout: Tips and Products to Use
earlyexperts.net
Sealing Grout: Tips and Products to Use
earlyexperts.net
In bathrooms and kitchens across the globe, you can find grout line discolorations, that in some instances, ruin the look and aesthetic design of the space. During renovations, remodels, and initial builds of either of these rooms, homeowners go to great lengths to ensure counters, backsplash scheme, flooring choice, wall color, and even the fashion of the hand towels all compliment one another.
It is a shame, then, to see these purposeful decisions erode over time, just like the grout that holds it all together. Because grout is typically cement based, it is extremely porous. This means that whether it is sanded or not, your grout lines will hug any substance with which it comes in contact.
You might be thinking well, I can just be careful when washing the dishes. But the grease and grime that comes off of your frying pan is just one small piece of the puzzle. To give you an idea of how sensitive exposed grout is to discoloration and erosion, consider this: well water is harder than city water in the minerals it carries. When your exposed, concrete grout is cased in the incidental spray from your sink, it will pull these minerals out causing hardened, white build ups in between your tile. Good luck getting rid of it! The backside of your sponge will not do. Masons typically use power grinders to clean up messes like this.
This is all very foreboding sounding, but there is an easy solution that if practiced with relative fidelity is sure to protect your grout lines from making unsolicited changes to your bathroom or kitchen color scheme. Applying a sealant to your grout yearly, or more in a high moisture area is all it really takes. Outlined below are all the tools and materials you’ll need, the process itself, and a short list of the best products on the market right now.
Choose Sealant
There a couple different types of sealer you can use for a process like this so you want to be sure you’ve informed yourself on how each differs from the next before making a purchase.
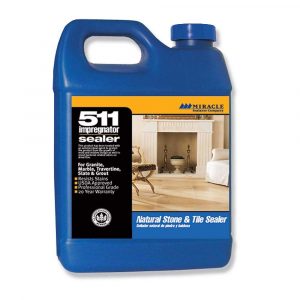
Penetrating sealers are water or mineral spirit based with latex or silicone particles mixed in. As the sealer seeps into the grout, the latex or silicone searches for space or pockets in the concrete to call home. Once they are settled in, they are keeping moisture out. This is the obvious choice for grout lines in bathroom showers, kitchen sink backsplashes, and other especially high moisture areas.
Our recommendation is the Miracle Sealants Impregnator.
Membrane-forming sealers are aptly name for the membrane or coating they form over the surface of the grout. This coated surface protects from moisture penetration. Because of this, however, membrane-forming sealers will also trap existing moisture in your grout, not allowing for evaporation. For this reason, this type of sealer is not best used in high moisture areas or places that have previously been exposed to wetness. Sealing over existing moisture increases the odds of mildew buildup. One plus is that membrane-forming sealers come in various pigment options, so you can change or establish that original grout color.
For membrane-forming sealers, also known as surface sealers, try the one below.

Application
Once you have established the type of sealer you will use, you must consider the application type that fits best with your level of comfort and the type of space where the sealing is happening. Many people like aerosol sealers because of the level of convenience and time-saving opportunity they provide. That said, these are tough to use to the full potential of the sealer if you have extremely thin grout lines and unsealed tiles. The overspray will seal portions of the tile in addition to the grout but not the whole thing, so you will have to go back over the tiles faces with a sponge to ensure an even spread.
Also, if your tiles are glazed, the sealant will not adhere so you will be wasting a lot of product in aerosol form. Your best bet is to use an applicator brush or to purchase a sealer that comes in a bottle outfitted with a special applicator wheel on top.
Apply the sealer one grout line at a time following a process similar to the one you used in cleaning. Again, this ensures you are able to track your progress without losing your place. Keep a dry cloth on hand to wipe up any spill or drip. Even if you are sealing the whole surface of the tile, drips that fall below to the countertop, for instance, will begin to dry quickly (within five minutes, or so).
Repeat
Let your first coat dry completely before applying the second coat. Yes, that’s right. On average it takes up to three coats to protect your grout lines completely. You can test how well your new seal is working with a few drops of water. The water should bead up. If not, you need another coat.
After the final coat, allow for at least twenty-four hours of cure time.
Conclusion
Sealing your grout lines is a tedious task requiring some inconvenient wait time. But that really is only true of the first application. Each of the annual or semi-annual seals after are less and less hassle. To summarize best practices:
- Clean the surface well
- Figure out the type of sealer that works best for you, information largely dependent on the potential for moisture
- Make an application plan
- Repeat until water droplets bead up in fear of your grout lines
Follow these steps to ensure the integrity of your bathroom or kitchen tile design and strength for years to come.
Most Read


How to Remove Rust From Tools: Tips That Work!
Jul 20, 2018

Smoke Detector Beeping? This Is What You Need To Do!
Jul 23, 2018