How to Use a Protractor: Types, Practical Tips and Tutorials
Our professionals share their best advice on how to use a protractor correctly. You will find a step by step tutorials as well as video resources to help you use a protractor.
Remember geometry class? Those pesky little plastic half circles that teacher handed out for measuring triangles? If you’re reading this and having trouble understanding what exactly we are talking about, then it is likely that in high school you belonged to the school of thought that believed “I will never use any of this stuff in the real world.”
For the majority of people, that is probably true. But as you are reading this article, it is safe to assume you’ve found yourself in a bit of a do-it-yourself conundrum: you are constructing something that needs precise angles and you’ve neither the tools or the knowledge to accurately obtain those numbers.
If this sounds familiar, you’ve come to the right place. Below you will find a comprehensive presentation on all things protractor and angle measuring: what types are there, how to use them, and even some helpful tips to ensure the angles on whatever it is you’re building are spot on.
Angle Measuring Tool Types
Believe it or not, there is more than one way to measure an angle. Here are some common protractor types you may find in your local office supply or hardware store and the ways they are best used.
1. Protractor and Circular Protractor
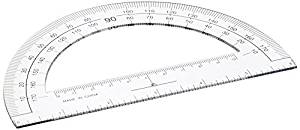
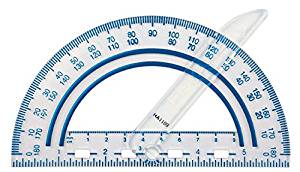
These are the most common type of angle measuring tool you will find. They are typically plastic and in some cases have a small adjustable straight edge hinged to the device itself so that lines can be drawn once the angle is matched.
The semicircular protractor is more like what you may have used in school. The semicircle protractor will have two scales, each graduated up to 180 degrees but in opposite direction. The full circle models will go up to 360.
The plastic circular and semicircular protractors are fine for doing high school level math and making general scale drawings, but for use in construction they can be tricky. This is because, in some cases, you will have to eyeball your mark based on the line shown on the protractor itself, which leaves room for a lack of precision.

2. The Machinist’s Protractor/Bevel Gauge Protractor
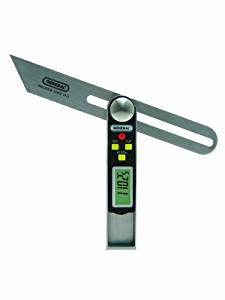
The machinist’s protractor makes up for all the places where the simple plastic protractor lacks. This tool also comes with a lot of bells and whistles, many of which are great for construction and do-it-yourself type projects.
There are models that include a center finder, drill point gauge, and a circle divider. The bevel gauge, as shown below, has a flat base plate so it can lie flush to any work surface. Attached to the base plate is the circular plate that is typically outfitted with a vernier scale graduated up to 360 degrees. The vernier scale refers to the second of hash marks in addition to the main hashes that are labeled by degree number. This allows for more precision in measurement.
Attached to the circular plate is a straight edge that moves as the circular plate moves to allow the user to draw perfectly straight lines to decimals of a degree. For a decent model of machinist’s protractor, plan on spending around $40-$50.

3. The Arm Protractor
The arm protractor is good to use when measuring at odd angles. The term odd is not meant to describe the angle being measured, but the angle at which you are measuring. For instance, if you are building a small trestle table and have already attached the top to the main side legs, you might use an arm protractor to get into the corner where the top meets the legs so you can accurately measure the angles for the x design.
The arm is attached to the circular plate at two distinct places. In both places, the circular plate is allowed rotation. This makes for nice adaptability and ease of use in places where you can’t quite get a flush plastic protractor or a machinist’s.
These are fairly inexpensive as they are typically plastic and of the same quality and durability as the plastic semicircular and circular protractors mentioned earlier. You can find one for around $5.

4. The Digital Protractor
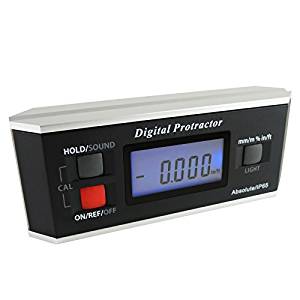
The digital protractor is surprisingly less functional than the others mentioned above. This is in part because it is meant to measure already existing angles and will not necessarily be a good predictor of accurate angles where angled structures do not yet exist.
It is simply a small digital rectangle that looks a lot like a level, except with a digital face. Place it flat on the angled surface and it will give you your angle. You can use the digital protractor to find an angle measurement that does not yet exist by laying the digital protractor flat on the flat plane and raising it slowly until you have reached the desired angle. Again though, you are eyeballing here, and allowing room for a much human error.
A digital protractor can be purchased fairly inexpensively despite the technology included, however, the range in price is rather large. For a decent one that won’t break the bank, plan for around $60.

How to Use
With the exception of the digital protractor, most angle measuring tools operate in the same way. This is because all are based on the same simple design and technology: a circle or semicircle that is marked for degrees graduated up to 360.
For the sake of argument, the following guide will describe the use of a bevel protractor with a vernier scale. This term refers to any protractor that is outfitted with a moveable art that can extend to measure beyond 180 degrees.
✓ Place the protractor base flat on one leg of the angle. Which side you use does not matter, as long as you are able to work with your tool from that side.
✓ Swivel the blade to form the other leg of the angle. To use the blade, you may have to unscrew the hinge point so that it loosens enough to move.
TIP: Over loosening the hinge nut will not allow the blade to stay in place over the desired angle leg.
✓ Locate zero on the vernier scale, the smaller, inside scale of the protractor.
✓ The degree of your angle will be the number located directly above zero on the vernier scale.
TIP: the reason you are not just reading the main degree scale is because you want to ensure a precise measurement. The vernier scale accounts for this level of precision and negates any potential eyeballing where an angle could seem to be either of two degrees.
✓ Read the minutes on the vernier scale. You can do this by looking left or counterclockwise for the first place that the line on the vernier scale patches that of the main scale.
TIP: with angles, fractions of degrees are measured in units called “minutes.” This is because a degree is broken up into sixty parts, much like an hour of time. A minute is then broken up into another set of sixty smaller parts, aptly referred to as “seconds.”
✓ When you read the angle, you will report it by saying degrees first, then minutes. For example, 70 degrees, 20 minutes. This is the equivalent of saying 70 and ⅓ degree.
Conclusion
There are many angle measuring tools on the market, and they all serve different purposes. Be sure you know what your most common use of an angle measuring device will be before you go out and spend what could be close to $100 on some stainless steel or digital products. The basic guide for how to use a bevel protractor that is outlined above is fairly transferable across different protractor types. This will be especially helpful for those of us who may not have been paying attention during high school geometry on the day the protractors came out.
All kidding aside, measuring angles is no easy feat, especially when you are in need of very precise angle measurements for whatever task you have on the docket. While it isn’t rocket science, it’s still science, and we can all use a practical refresher from time to time to ensure our do-it-yourself projects come out as perfect as can be.
