
Easy Steps to Patch and Fix a Hole in the Wall
Got a wall in your home that’s more hole than drywall? Don’t panic, I’ve been there too; these things happen whether it’s due to accidental damage or making changes like moving furniture or hanging art.
Luckily, my mishaps have led me on a quest to master the DIY of fixing walls. Let’s dive into this guide and turn those unsightly holes into just another memory. Get ready to roll up your sleeves – we’re about to make those walls look good as new!
Understanding the Size of the Hole
It’s crucial to identify the size of the hole in your wall before getting into repairs. The extent of damage dictates both the materials required and steps needed for a successful fix.
Small holes – think nail or screw sized – require fewer materials and less time than larger ones.
A hole smaller than ½ inch can usually be filled with joint compound, then sanded smooth for an even finish. As we move up in size, say a doorknob-sized dent or accident-caused mishap, expect more complexity during repair.
Large holes might necessitate cutting out a section of drywall and replacing it entirely, requiring additional tools such as a utility knife, drywall saw and possibly even furring strips for support.
Keep in mind that if your wall has textured finishes, there may be extra steps involved to ensure visual consistency after repair is complete. And irrespective of the hole’s size, primer application post-repair is essential to achieve a seamless paint result alongside patching work.
Necessary Tools and Materials for Drywall Repair
To tackle a drywall repair job efficiently, it’s beneficial to have the right tools and materials at hand. Here’s what you will need:
- Drywall: This is the material that will be used to patch up medium to large sized holes.
- Drywall Screws: These will secure your new piece of drywall to the furring strips in larger hole repairs.
- Drywall Tape: This helps cover seams between pieces of drywall.
- Joint Compound: Also known as “mud,” this material is used to smooth out the surface after a repair.
- Drywall Sander: This tool is for smoothing out rough spots after applying joint compound.
- Drywall Saw: You’ll use this for cutting pieces of replacement drywall needed for larger hole repairs.
- Dust Mask: A mask protects you from inhaling dust created during sanding.
- Paintbrush: After accomplishing the fixes, you’d need this for repainting the repaired area.
- Screw Gun: To rapidly drive screws into drywall or furring strips, a screw gun comes handy.
- Taping Knife: This tool is used to apply joint compound over seams and around newly installed patches of drywall.
- Utility Knife: Having one enables precise cuts of drywall and tape.
How to Repair Very Small Holes and Dents in Drywall
Locate the damage, fill the hole with spackle, wait for it to dry, sand and paint – learn how to fix small holes in drywall easily!
Locate the Damage
Spotting the wall damage is your first crucial step in drywall repair. Bring light to every corner of the room and search for defects such as pinholes, small dents, or large breakouts on your interior walls.
The type of wall damage will dictate what tools and materials you’ll need for fixing it. Smaller blemishes might be less obvious, so take your time examining the surface for any irregularities thoroughly.
Ensuring you have identified all areas that require attention will make your home maintenance task smoother and more efficient.
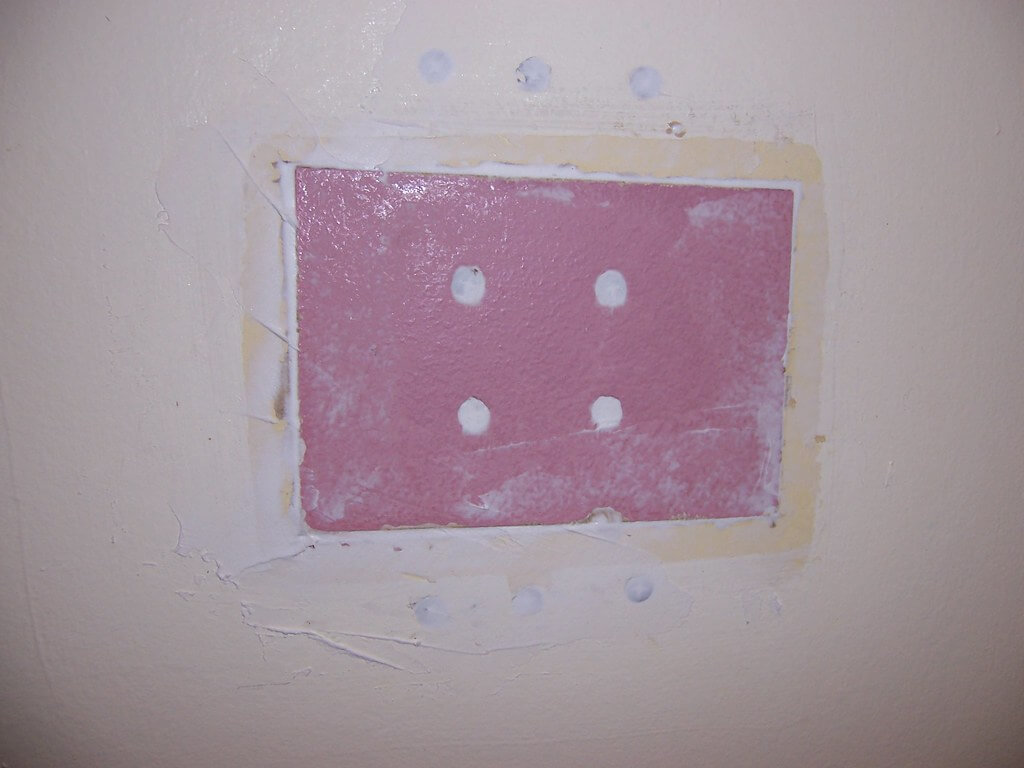
Fill the Hole, Dent, or Ding with Spackle
To fix very small holes, dents, or dings in drywall, start by filling them with spackle. Take a small amount of spackle, about the size of a pea, and smooth it into the damaged area using a putty knife.
Make sure to press the spackle firmly into the hole to create a seamless patch. Once the spackle is applied, wait for it to dry before moving on to the next step.
Wait for the Spackle to Dry
Waiting for the spackle to dry is a crucial step in repairing very small holes and dents in drywall. Once you have filled the hole, dent, or ding with spackle, it’s important to let it dry completely before moving on to the next step.
This usually takes around 24 hours, but make sure to check the drying time indicated on the product label. Patience is key here, as rushing this step can result in an uneven and less durable repair.
So resist the temptation to sand or paint until the spackle is fully dried and hardened.
Sand and Paint the Repair
To complete the drywall repair, it is important to sand and paint the patched area. After allowing the joint compound to fully dry, grab a fine-grit sanding sponge or sandpaper and gently sand the repaired surface.
This will help smooth out any ridges or imperfections in the compound. Be sure to blend the edges of the repair into the surrounding wall for a seamless finish.
Once you have finished sanding, it’s time to paint! Use a primer first to seal both the new drywall and joint compound. This will create an even surface for your paint and ensure proper adhesion.
After priming, apply your selected wall color using a roller or brush, making sure to cover the entire patched area as well as blending it with the surrounding wall. Allow ample drying time before applying additional coats if necessary.
Fixing Small Holes in Drywall
To fix small holes in drywall, start by sanding or scraping the edges of the hole to create a smooth surface.
Sand or Scrape the Edges of the Hole
Sanding or scraping the edges of the hole is an important step in fixing small holes in drywall. It helps to remove ridges and create a smooth transition between the repaired area and the rest of the wall.
By carefully sanding or scraping, you can achieve a professional finish that blends seamlessly with the surrounding wall. Depending on the size and depth of the hole, you can use either sandpaper or a putty knife for this task.
Just be sure to take your time and avoid damaging the surrounding drywall while working on this step.
Apply the Patch
I take the patch that I have prepared, whether it is a pre-made adhesive patch or a piece of drywall cut to fit the hole. Carefully, I place the patch over the hole and press it firmly into place.
With a putty knife, I then spread joint compound over the edges of the patch, feathering it out to create a smooth transition with the surrounding wall. Once I am satisfied with the coverage, I let it dry completely before sanding and painting over it.
It’s important to ensure that the patch is securely attached and blended well with the rest of the wall for a seamless repair.
Spread the Spackle
To repair small holes in drywall, one important step is to spread the spackle. After cleaning and preparing the damaged area, take a putty knife or a taping knife and apply a thin layer of spackle over the hole.
Use smooth, even strokes to spread it out, making sure to cover the entire hole and surrounding area. The spackle will fill in the hole and create a smooth surface for painting later on.
Allow the spackle to fully dry before moving on to sanding and painting your repair. Remember, spackling is most effective for holes smaller than ½ inch in size and can be sanded down for seamless results.
Let the Spackle Dry
After filling the small holes, dents, or dings in the drywall with spackle, it is crucial to let it dry completely. This step allows the spackle to harden and bond properly with the wall surface.
It’s recommended to wait for at least 24 hours before moving on to the next step of sanding and painting. By giving enough time for the spackle to dry, you ensure a smooth and seamless repair that will blend seamlessly with the surrounding wall.
Sand and Paint
After the spackle has dried, it’s time to sand and paint the repair. Take a fine-grit sanding sponge or sandpaper and gently smooth out any ridges or uneven edges on the patched area.
Sand until the surface feels smooth to the touch. Once you’re done sanding, wipe away any dust with a clean cloth or sponge. Now you can apply a coat of primer to seal the repaired area before painting.
Make sure to use paint that matches your existing wall color for a seamless finish. Apply two coats of paint, allowing each coat to dry completely before adding another one. And there you have it – your hole in the wall is now fully repaired and ready for a fresh coat of paint!
Repairing Medium-sized Holes with Drywall Mesh Tape
Repairing medium-sized holes in drywall is a straightforward process that requires the use of drywall mesh tape. Here’s how to fix them:
- Square off the hole using a utility knife or drywall saw.
- Cut a piece of drywall mesh tape slightly larger than the hole.
- Press the mesh tape firmly over the hole, ensuring it covers all edges.
- Apply a thin layer of joint compound over the mesh tape, using a putty knife.
- Smooth out the compound with the putty knife, feathering it out onto the surrounding wall.
- Allow the joint compound to dry completely.
- Sand the repaired area with fine – grit sandpaper until smooth.
- Wipe away any dust or debris with a damp cloth.
Patching Large Holes in Drywall
Patching large holes in drywall can be intimidating, but with the right tools and techniques, it’s a manageable DIY project. Let’s dive into how to tackle this repair!
Measure and Cut a Piece of Drywall
To repair large holes in drywall, you’ll need to measure and cut a piece of drywall that fits perfectly into the damaged area. Start by measuring the hole to determine the size of the patch needed.
Use a sheetrock saw or a razor-knife to carefully cut out a piece of drywall that matches these measurements. Attention to detail is key here, as an accurate fit will ensure a seamless repair.
Remember to prepare the area and have your tools ready before taking measurements and cutting the drywall.
Cut the Drywall Around the Hole
Cutting the drywall around the hole is an essential step when it comes to patching large holes in drywall. By carefully measuring and marking the area, you can use a utility knife or drywall saw to cut away any damaged or compromised sections of drywall surrounding the hole.
This ensures that your patch will fit snugly into place and provides a clean edge for attaching new drywall or a patch. Taking your time during this step will result in a more seamless repair and help restore the structural integrity of your wall.
Install Furring Strips
To ensure a secure and stable repair, it is important to install furring strips when patching large holes in drywall. These strips serve as support for the drywall patch, preventing it from sagging or falling out over time.
To install furring strips, begin by measuring and cutting the strips to fit inside the hole. Then, attach them securely to the surrounding wall using screws. Once the furring strips are in place, you can proceed with attaching the patch and applying joint tape and compound for a professional-looking finish.
By installing furring strips, you can have confidence that your repair will last and maintain its structural integrity for years to come.
Attach the Patch to the Furring Strips
To attach the patch to the furring strips, measure and cut a piece of drywall that fits snugly into the hole. Then, secure two furring strips vertically on either side of the hole using screws and a drill.
Make sure half of each strip is attached to the drywall and half sticks out into the hole for support. Once the furring strips are in place, position the patch over them and use screws or nails to secure it firmly onto the strips.
This ensures a strong attachment that will prevent the patch from coming loose over time.
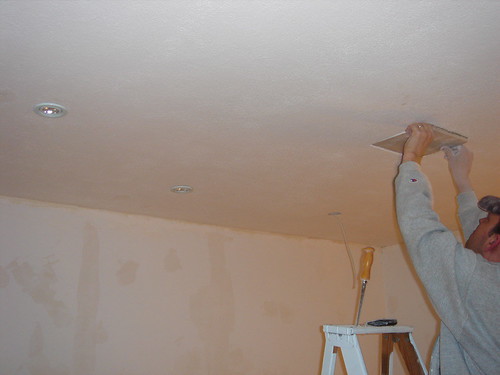
Apply Joint Tape and Joint Compound
Applying joint tape and joint compound is an essential step when patching large holes in drywall. This process helps to create a seamless and sturdy surface for the repair. First, apply the joint tape over the seams of the hole, making sure it extends beyond the edges for reinforcement.
Next, using a putty knife or trowel, spread a layer of joint compound over the tape, smoothing it out evenly. Allow it to dry completely before applying additional coats of compound if needed.
Remember to sand down any rough spots after each layer has dried, ensuring a smooth finish. Applying joint tape and compound ensures that your repair will be durable and blend seamlessly with the surrounding wall.
Let Dry, Then Sand and Paint
Once you have applied the joint tape and joint compound to repair medium-sized holes in drywall, it is crucial to let it dry completely before moving on. This typically takes around 24 hours, but may vary depending on the humidity level in your home.
After it has dried thoroughly, grab a fine-grit sanding sponge or sandpaper and gently sand the repaired area until it is smooth and level with the surrounding wall. Remember to wear a dust mask while sanding to protect your lungs from any debris.
Once you have sanded down the area, wipe away any dust with a damp cloth or sponge before applying paint. Choose a high-quality paint that matches the rest of your wall’s color and use a brush or roller to carefully apply an even coat over the repaired section.
Two Options for Large Hole Repair
When it comes to repairing large holes in a wall, there are two main options you can consider.
Option 1: Chicago Patch
I prefer using the Chicago patch method when repairing large holes in drywall. With this technique, I start by squaring off the hole and bracing it with a piece of wood. Then, I prepare a custom-sized drywall patch and apply it using drywall compound.
Once the patch is in place, I sand it down to ensure a smooth finish. After that, I prime and paint the area to match the surrounding wall color. If my wall has a textured finish like “orange peel” or “knockdown,” I make sure to apply texture as well for a seamless repair.
The Chicago patch method may take some time and effort, but it’s worth it for fixing larger holes in drywall effectively.
Option 2: Regular Patch
For larger holes in your drywall, one option is the regular patch method. This involves squaring off the hole and bracing it with a piece of wood. Then, you’ll attach a piece of drywall as a patch, using screws or nails to secure it into place.
After that, apply mesh tape over the seams and cover it with multiple layers of drywall compound. Once everything is dry, sand down any rough spots and finish off by priming and painting the repair area for a seamless finish.
While this method can be more time-consuming and require some skill, it can provide a sturdy and durable fix for those larger holes in your wall.
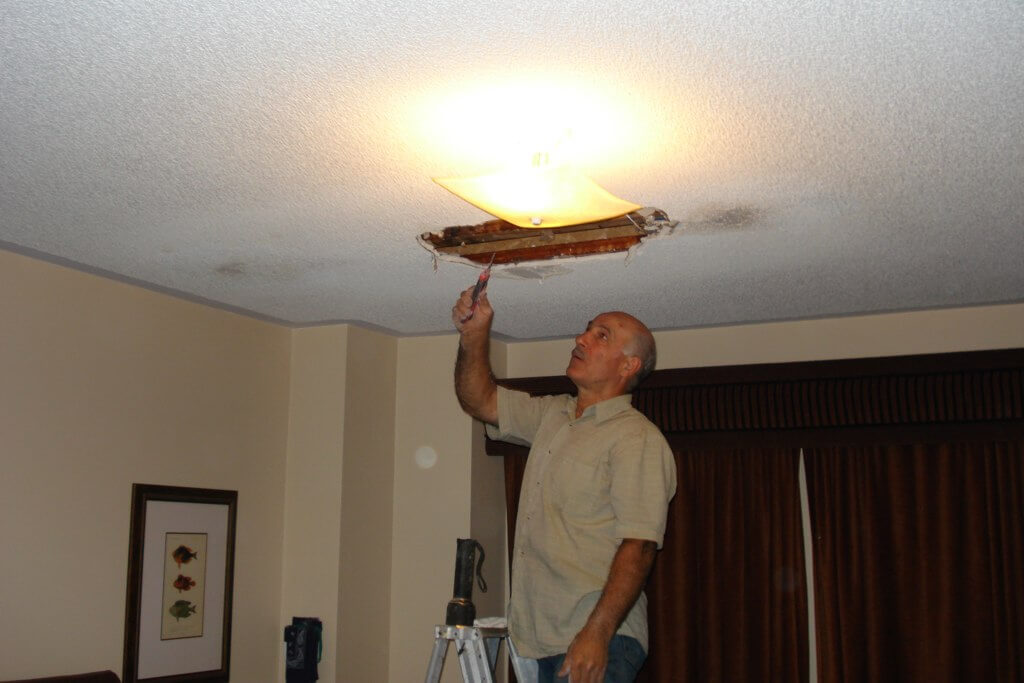
How to Fix a Large Hole in Sheetrock Wall
Repairing a large hole in a sheetrock wall involves the following steps:
- Cut out the damaged area of the sheetrock.
- Measure and cut a replacement piece of sheetrock.
- Secure the replacement piece to the studs on both sides of the hole using screws.
- Apply a thin layer of joint compound to the seam around the patch.
- Apply sheetrock tape around all sides of the patch.
- Use joint compound to fill in and smooth out the taped seams.
- Allow the joint compound to dry overnight.
- Sand the joints with 220 grit sandpaper for a smooth finish.
- Prime and paint the entire wall for a seamless appearance.
Repairing a Large Hole in a Lath and Plaster Wall
Repairing a large hole in a lath and plaster wall can seem daunting, but with the right tools and materials, it can be done easily. Here are the steps to follow:
- Remove any loose plaster and screw down any loose lath using sheetrock screws and wide thin washers.
- Measure and cut a piece of drywall to fit the hole, making sure it’s slightly smaller than the opening.
- Install furring strips along the edges of the hole using screws.
- Attach the drywall patch to the furring strips using screws.
- Apply joint tape over the seams between the patch and existing wall, pressing it firmly into place.
- Next, apply joint compound over the tape using a taping knife, feathering it out to create a smooth transition.
- Let the joint compound dry completely, which may take up to 24 hours depending on the temperature and humidity.
- Once dry, sand the repaired area with 220 grit sandpaper until it feels smooth to touch.
Tips and Tricks for Drywall Patching
When patching drywall, there are a few tips and tricks that can help you achieve professional-looking results. Firstly, it’s important to properly prepare the damaged area by removing any loose debris and chipping paint.
This will ensure that the patch adheres securely and blends in seamlessly with the surrounding wall. Secondly, when applying joint compound or spackle, use a feathering technique to create a smooth transition between the patch and the existing wall surface.
This involves gradually thinning out the compound as you move away from the center of the patch. Finally, for textured finishes like “orange peel” or “knockdown,” it may be necessary to use specialized techniques or tools to recreate the texture on the repaired area.
By following these tips and tricks, you can achieve professional-quality drywall repairs in your home without calling in a professional.
Remember: Proper preparation is key to successful drywall patching. Don’t forget to remove loose debris before starting your repair project for optimal results.
Conclusion
In conclusion, repairing a hole in the wall is a task that can be accomplished by homeowners with the right tools and techniques. Whether it’s a small dent or a large hole, following the proper steps and taking your time will ensure a seamless repair.
Remember to clean the area, fill the hole with spackle or joint compound, sand it smooth, and finish off with primer and paint. If you’re unsure or dealing with a larger hole, don’t hesitate to call in professional help for expert advice and results.
Happy patching!
FAQs
1. What tools and materials do I need to fix a hole in the wall?
To fix a hole in the wall, you will need spackle or joint compound, sandpaper, a putty knife, primer, paint that matches your wall color, and a utility knife or saw for cutting any loose or damaged drywall.
2. How do I prepare the hole before fixing it?
Before fixing the hole, you should clean out any debris from the area and remove any loose or damaged drywall around the edges of the hole. You may also need to cut away any protruding nails or screws.
3. What is the best method for patching a small hole in drywall?
For small holes in drywall (up to 2 inches in diameter), you can use spackle or joint compound. Apply multiple thin layers of compound over the hole, allowing each layer to dry and sanding between each layer until smooth.
4. How do I repair a larger hole in the wall?
For larger holes in drywall (over 2 inches in diameter), you will need to create a patch using new drywall. Cut out a square or rectangular shape around the hole and insert a new piece of drywall into the opening. Secure it with screws or nails, then apply joint compound over the seams and blend it with the surrounding wall surface using several layers of compound as needed.